The WhatsApp Cloud API lets you send messages programmatically with a single HTTP POST to https://graph.facebook.com/v22.0/{phone-number-id}/messages. You need a Meta WhatsApp Business Account, an access token, and a recipient phone number.
The complications start when you need to send media, manage templates at scale, handle rate limits, or message users outside the 24-hour service window. This tutorial walks through both paths: the direct Meta Cloud API (free, more setup) and the Zernio WhatsApp API.
In this guide
- Prerequisites
- How do you set up the WhatsApp Cloud API?
- How to send WhatsApp messages with Node.js
- How to send media (images, video, documents) via the WhatsApp API
- How to send a WhatsApp message in Python
- Common WhatsApp API errors and how to fix them
- What's the easiest way to send WhatsApp messages?
- Cloud API vs Zernio: which to choose
- FAQ
TL;DR — 10-minute path
- Create a Meta Business Account
- Generate an access token under WhatsApp → API Setup
- Add your test recipient's phone number
- Run the curl command above
- You'll get a "hello_world" template message on WhatsApp
For production, you'll need template approval, webhook configuration, and a verified business number. Skip to the Common errors section if you hit issues, or jump to Zernio's managed setup to skip the infrastructure work.
Prerequisites
To follow along with this tutorial, ensure you have the following:
- WhatsApp Account: An active WhatsApp account to receive and test messages sent via the API.
- WhatsApp Business Account (WABA): Required to send messages and templates. You can create one via WhatsApp Business.
- Node.js: A JavaScript runtime that allows you to run JavaScript code outside the browser. Download it from nodejs.org.
- Code Editor: A software application used for writing and editing code. For example, Visual Studio Code is widely used for JavaScript development.
How do you set up the WhatsApp Cloud API?
Before sending messages programmatically, you need to set up the WhatsApp API on Meta. In this section, you will create an app, generate an access token, and send your first message.
To get started, visit Meta for Developers, sign in, and click the My Apps button at the top of the page.

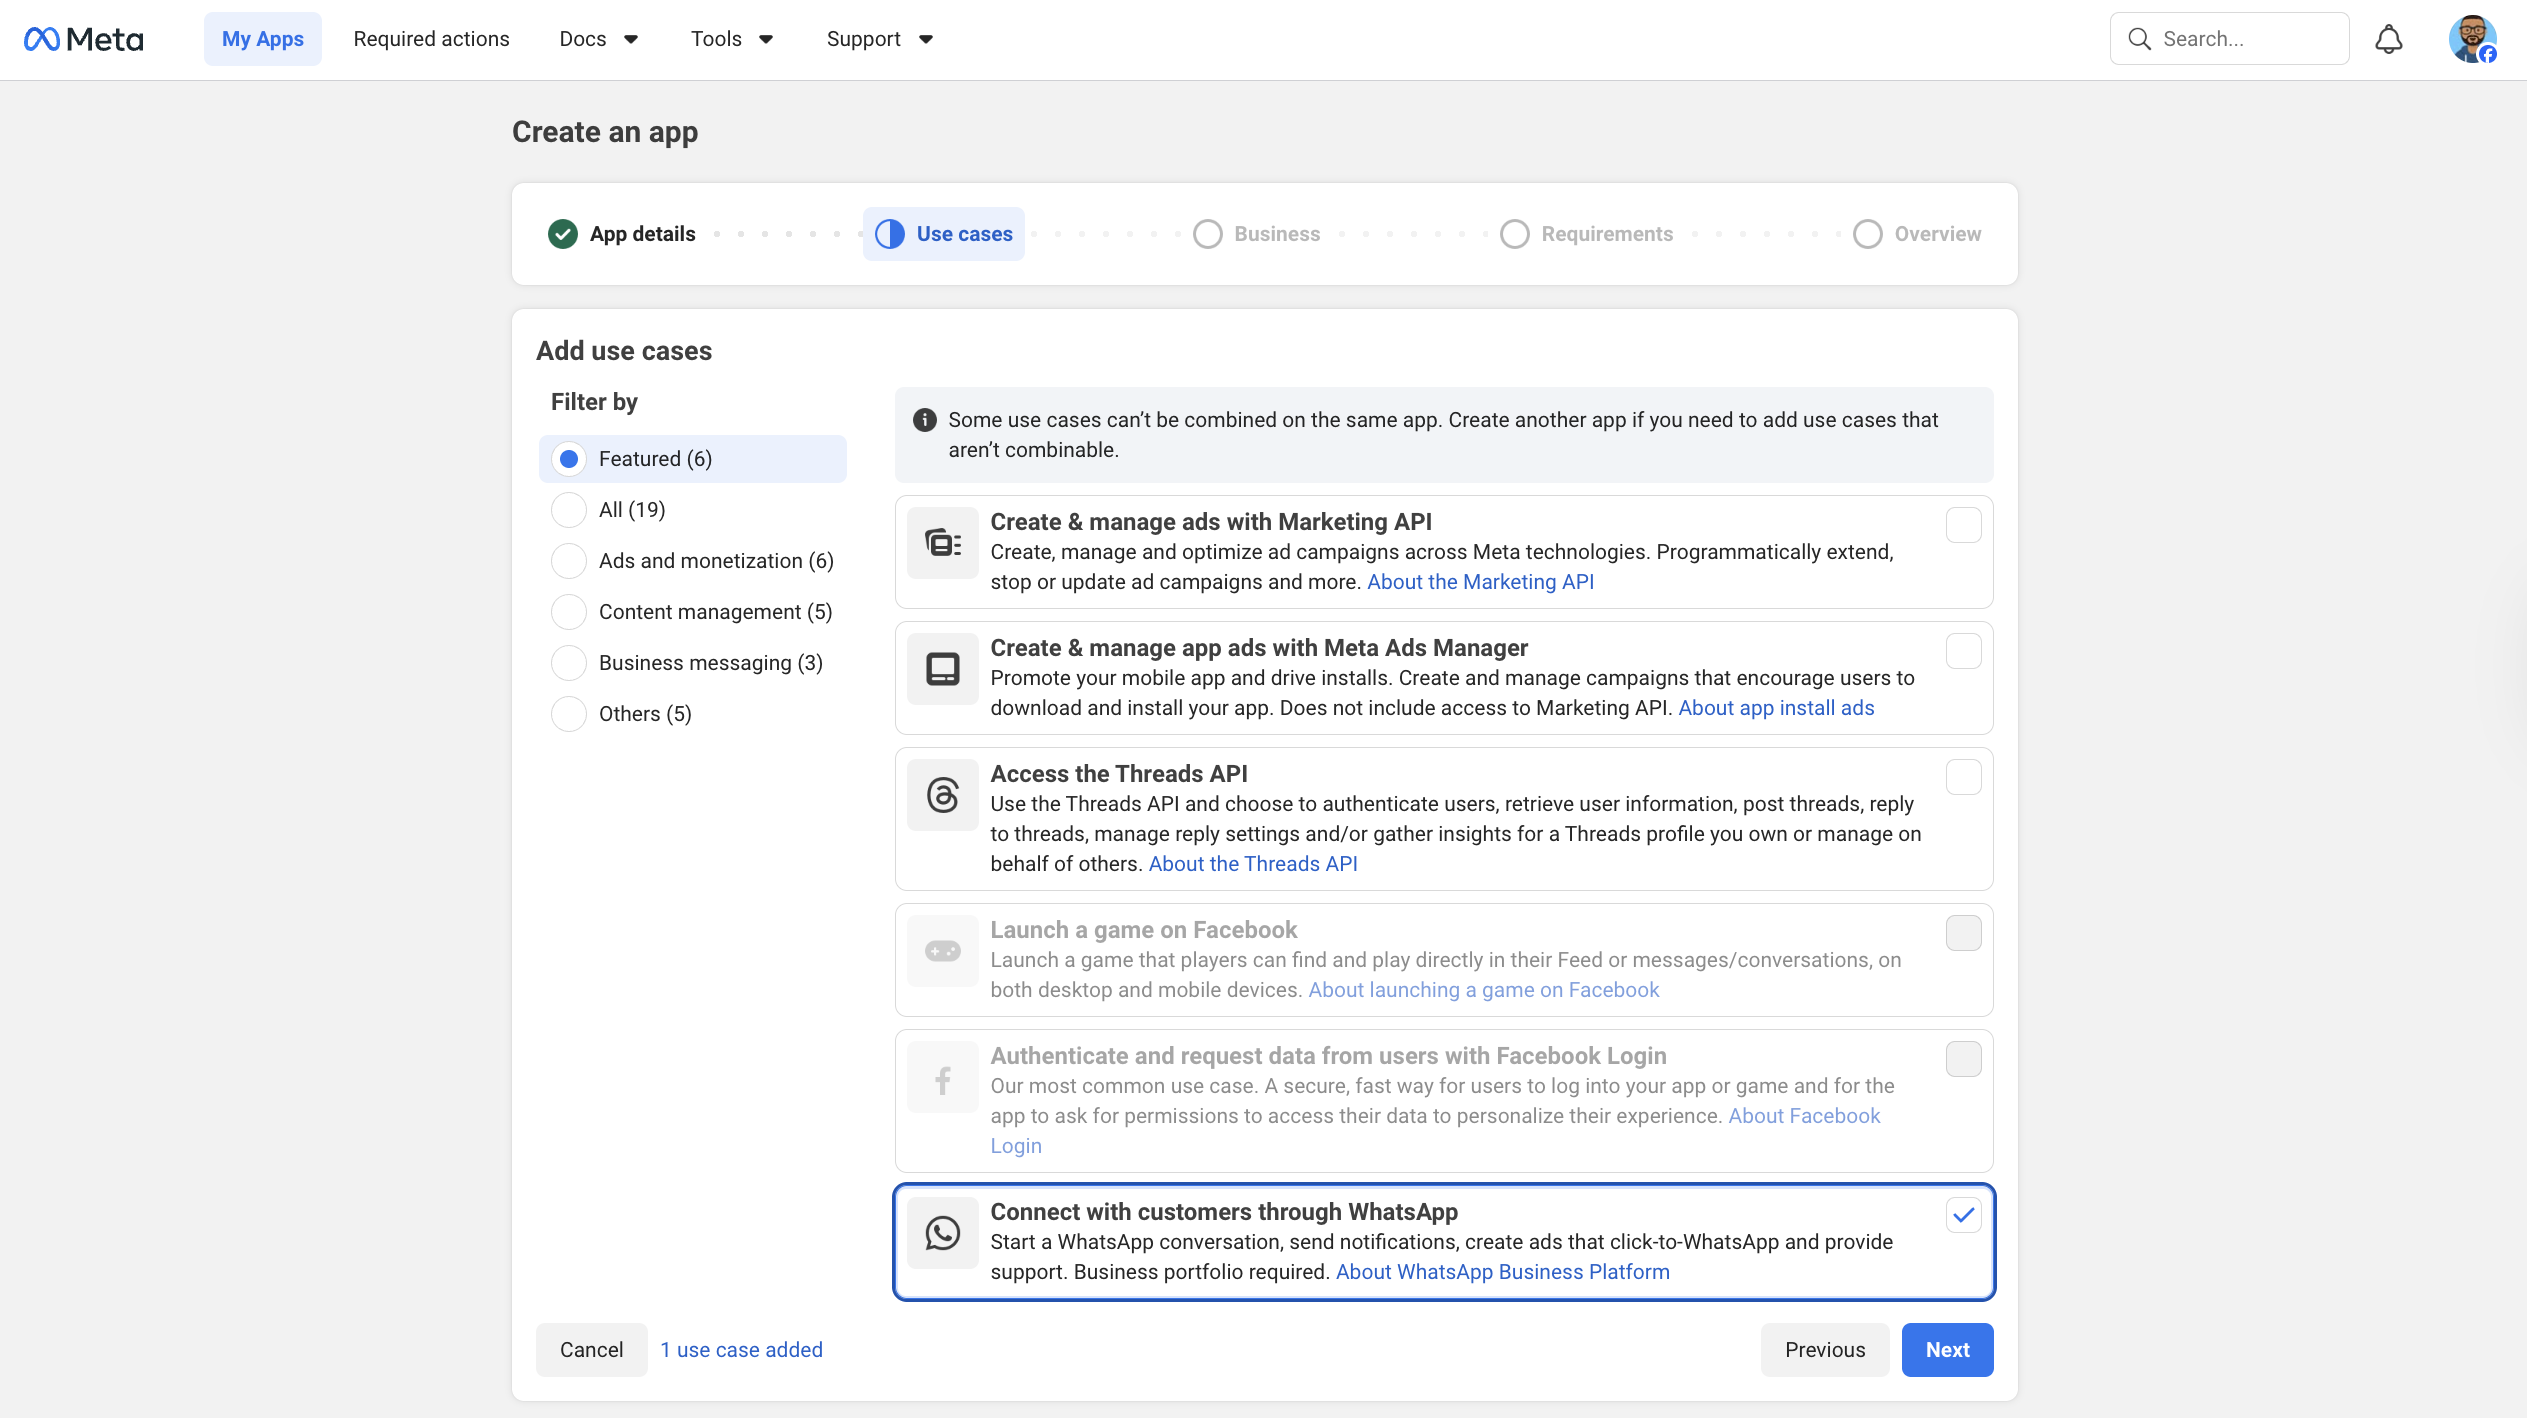
Next, enter your app details and select "Connect with customers through WhatsApp" as the use case.
Verify the app details and create a new app.
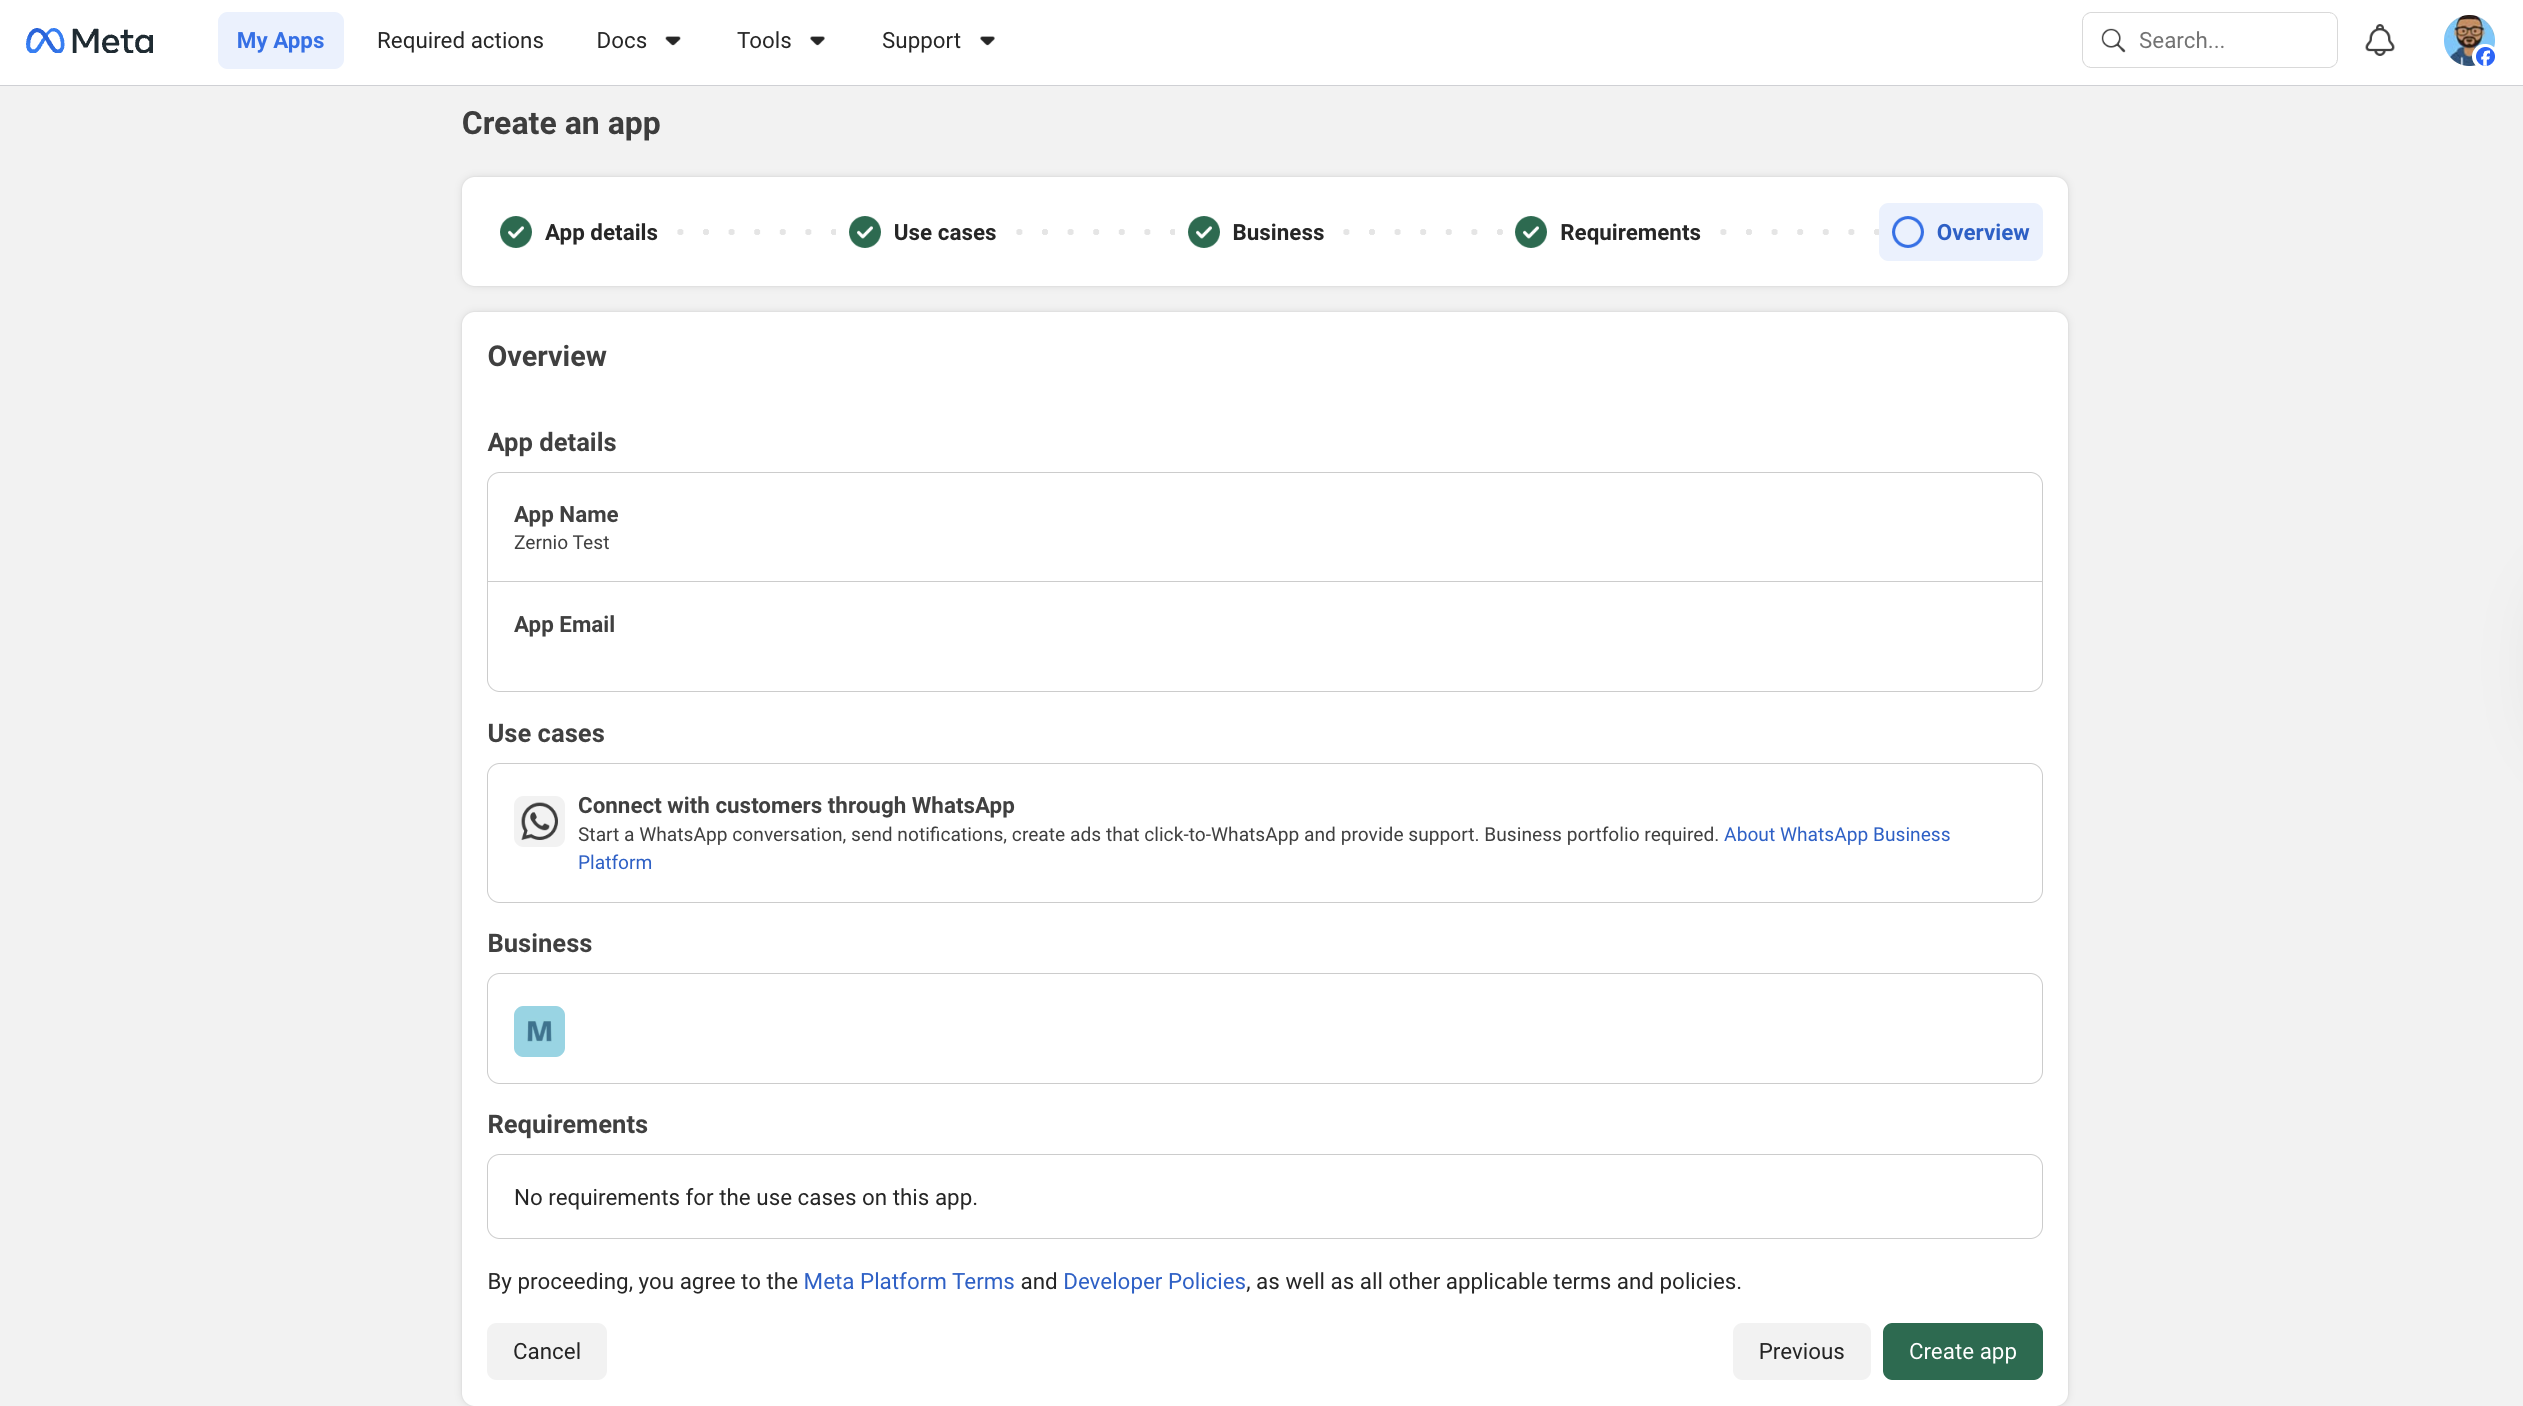
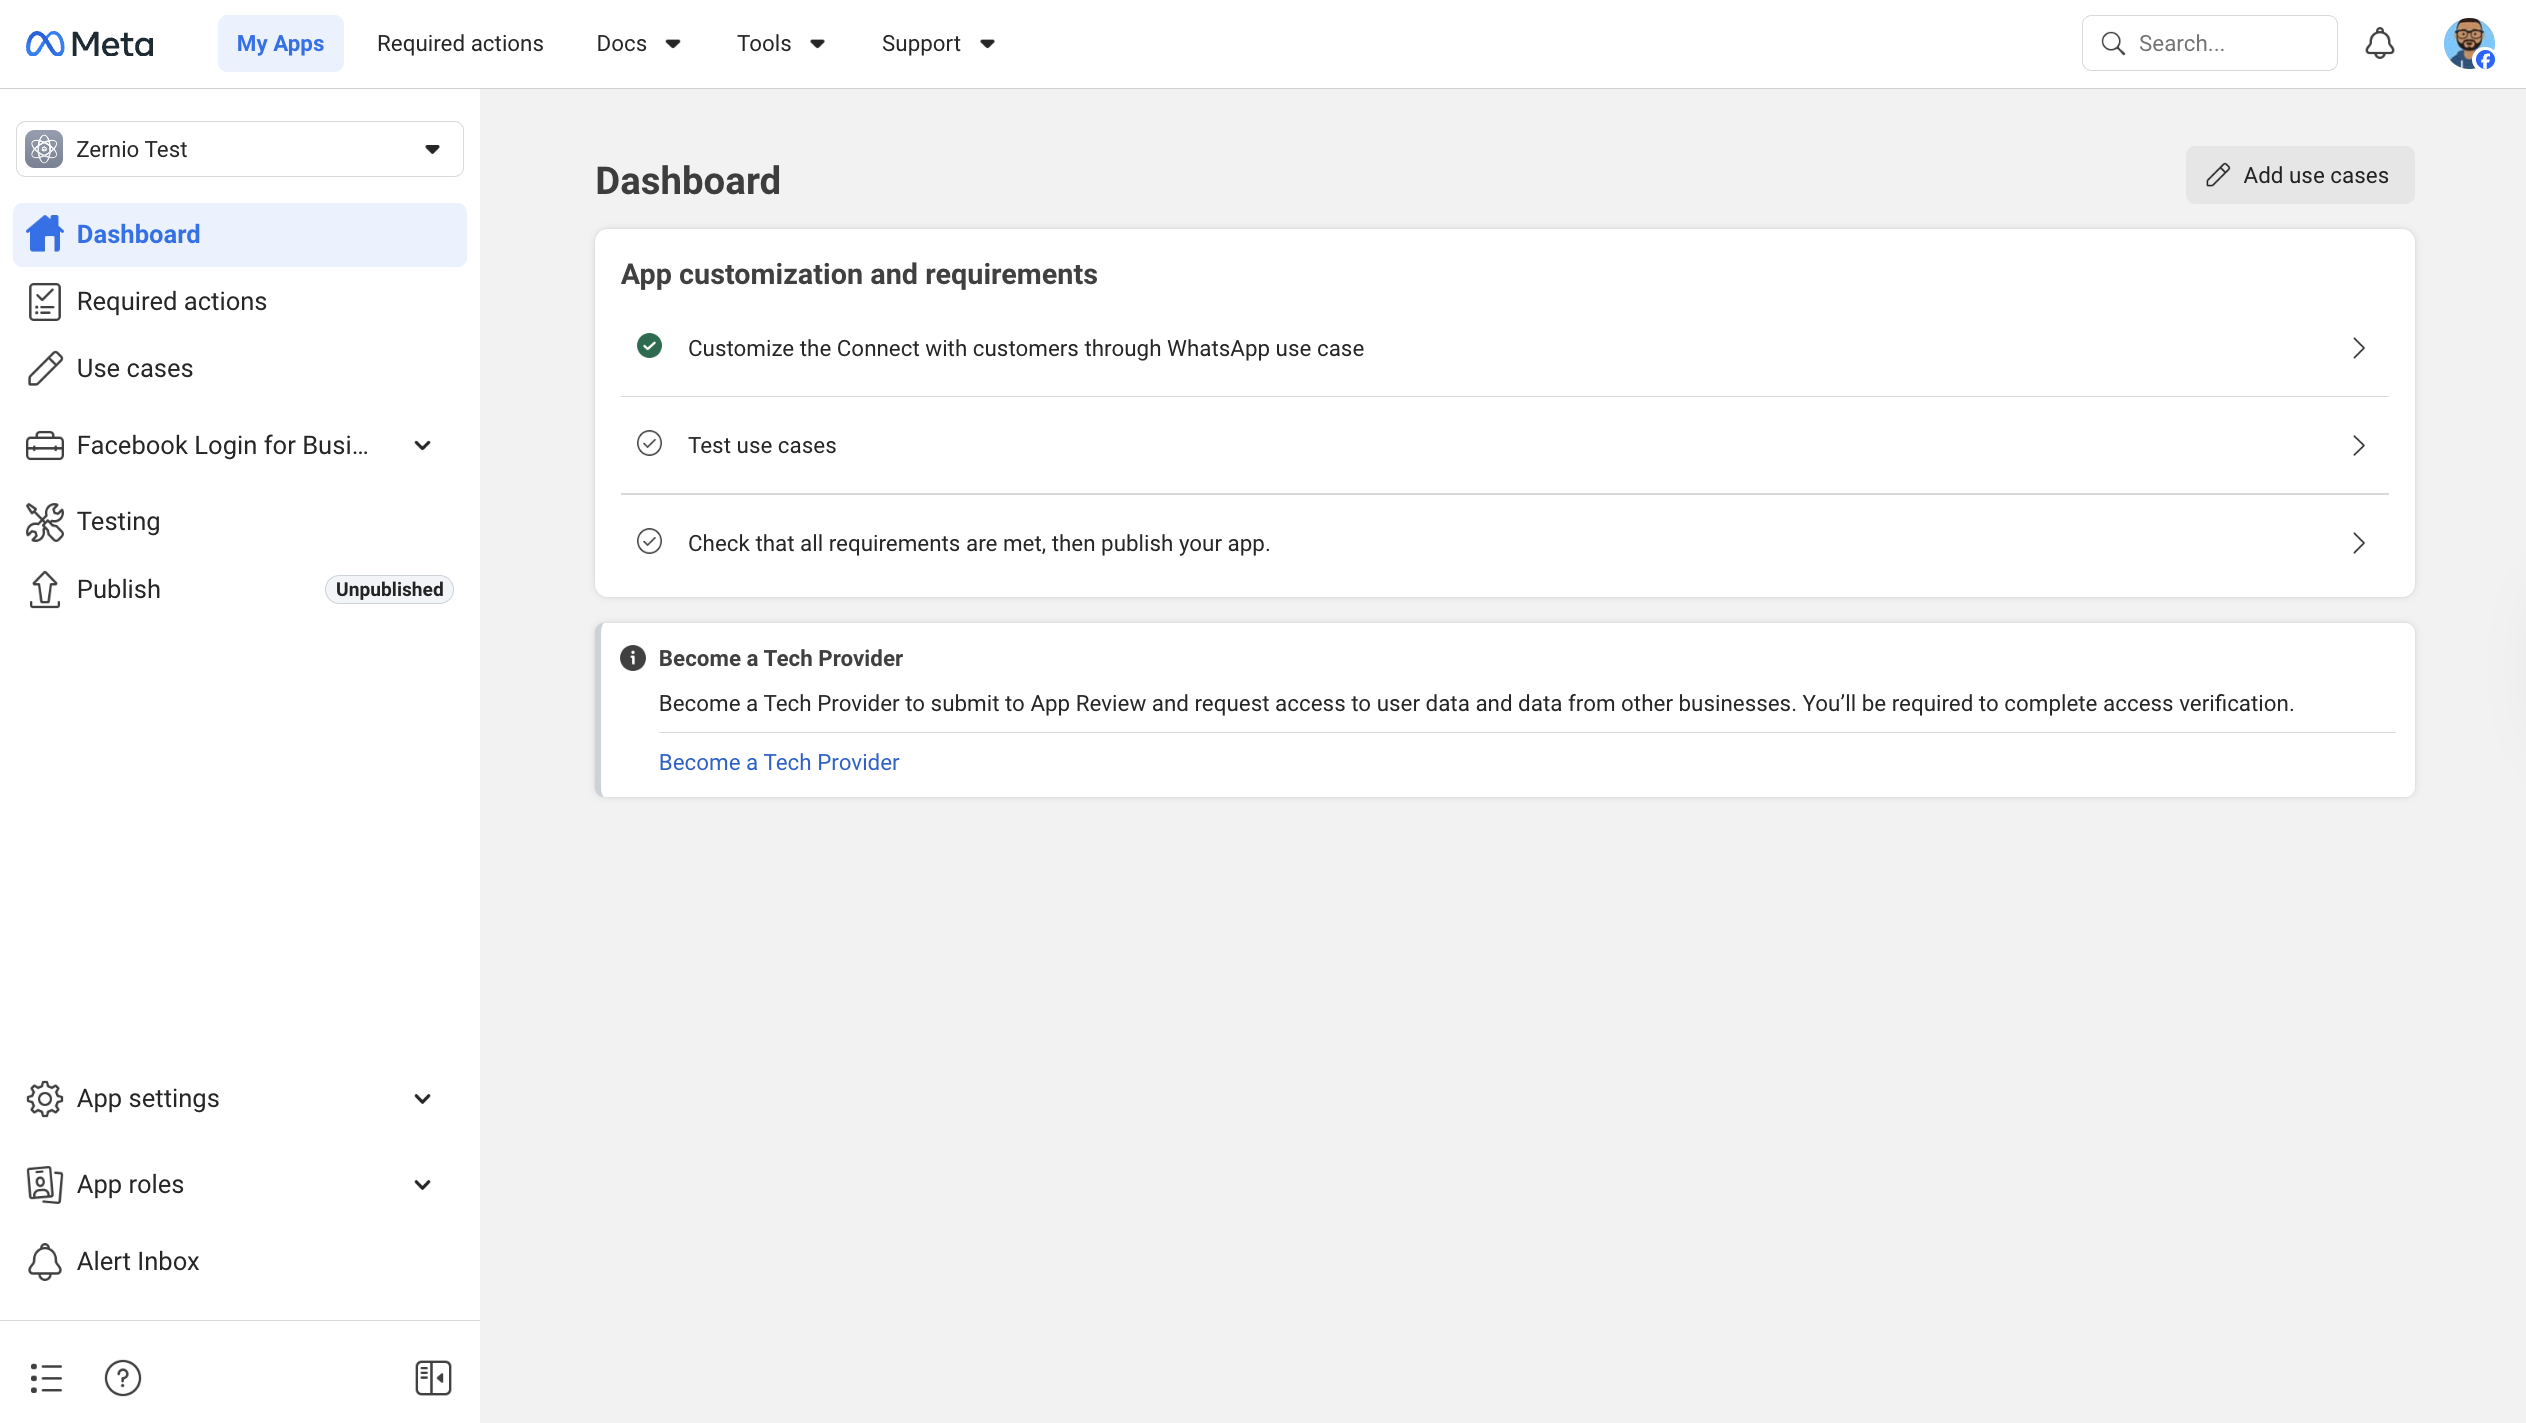
After creating the app, configure it based on your use case.
Select API Setup from the sidebar menu and click Generate access token to create your authentication token.
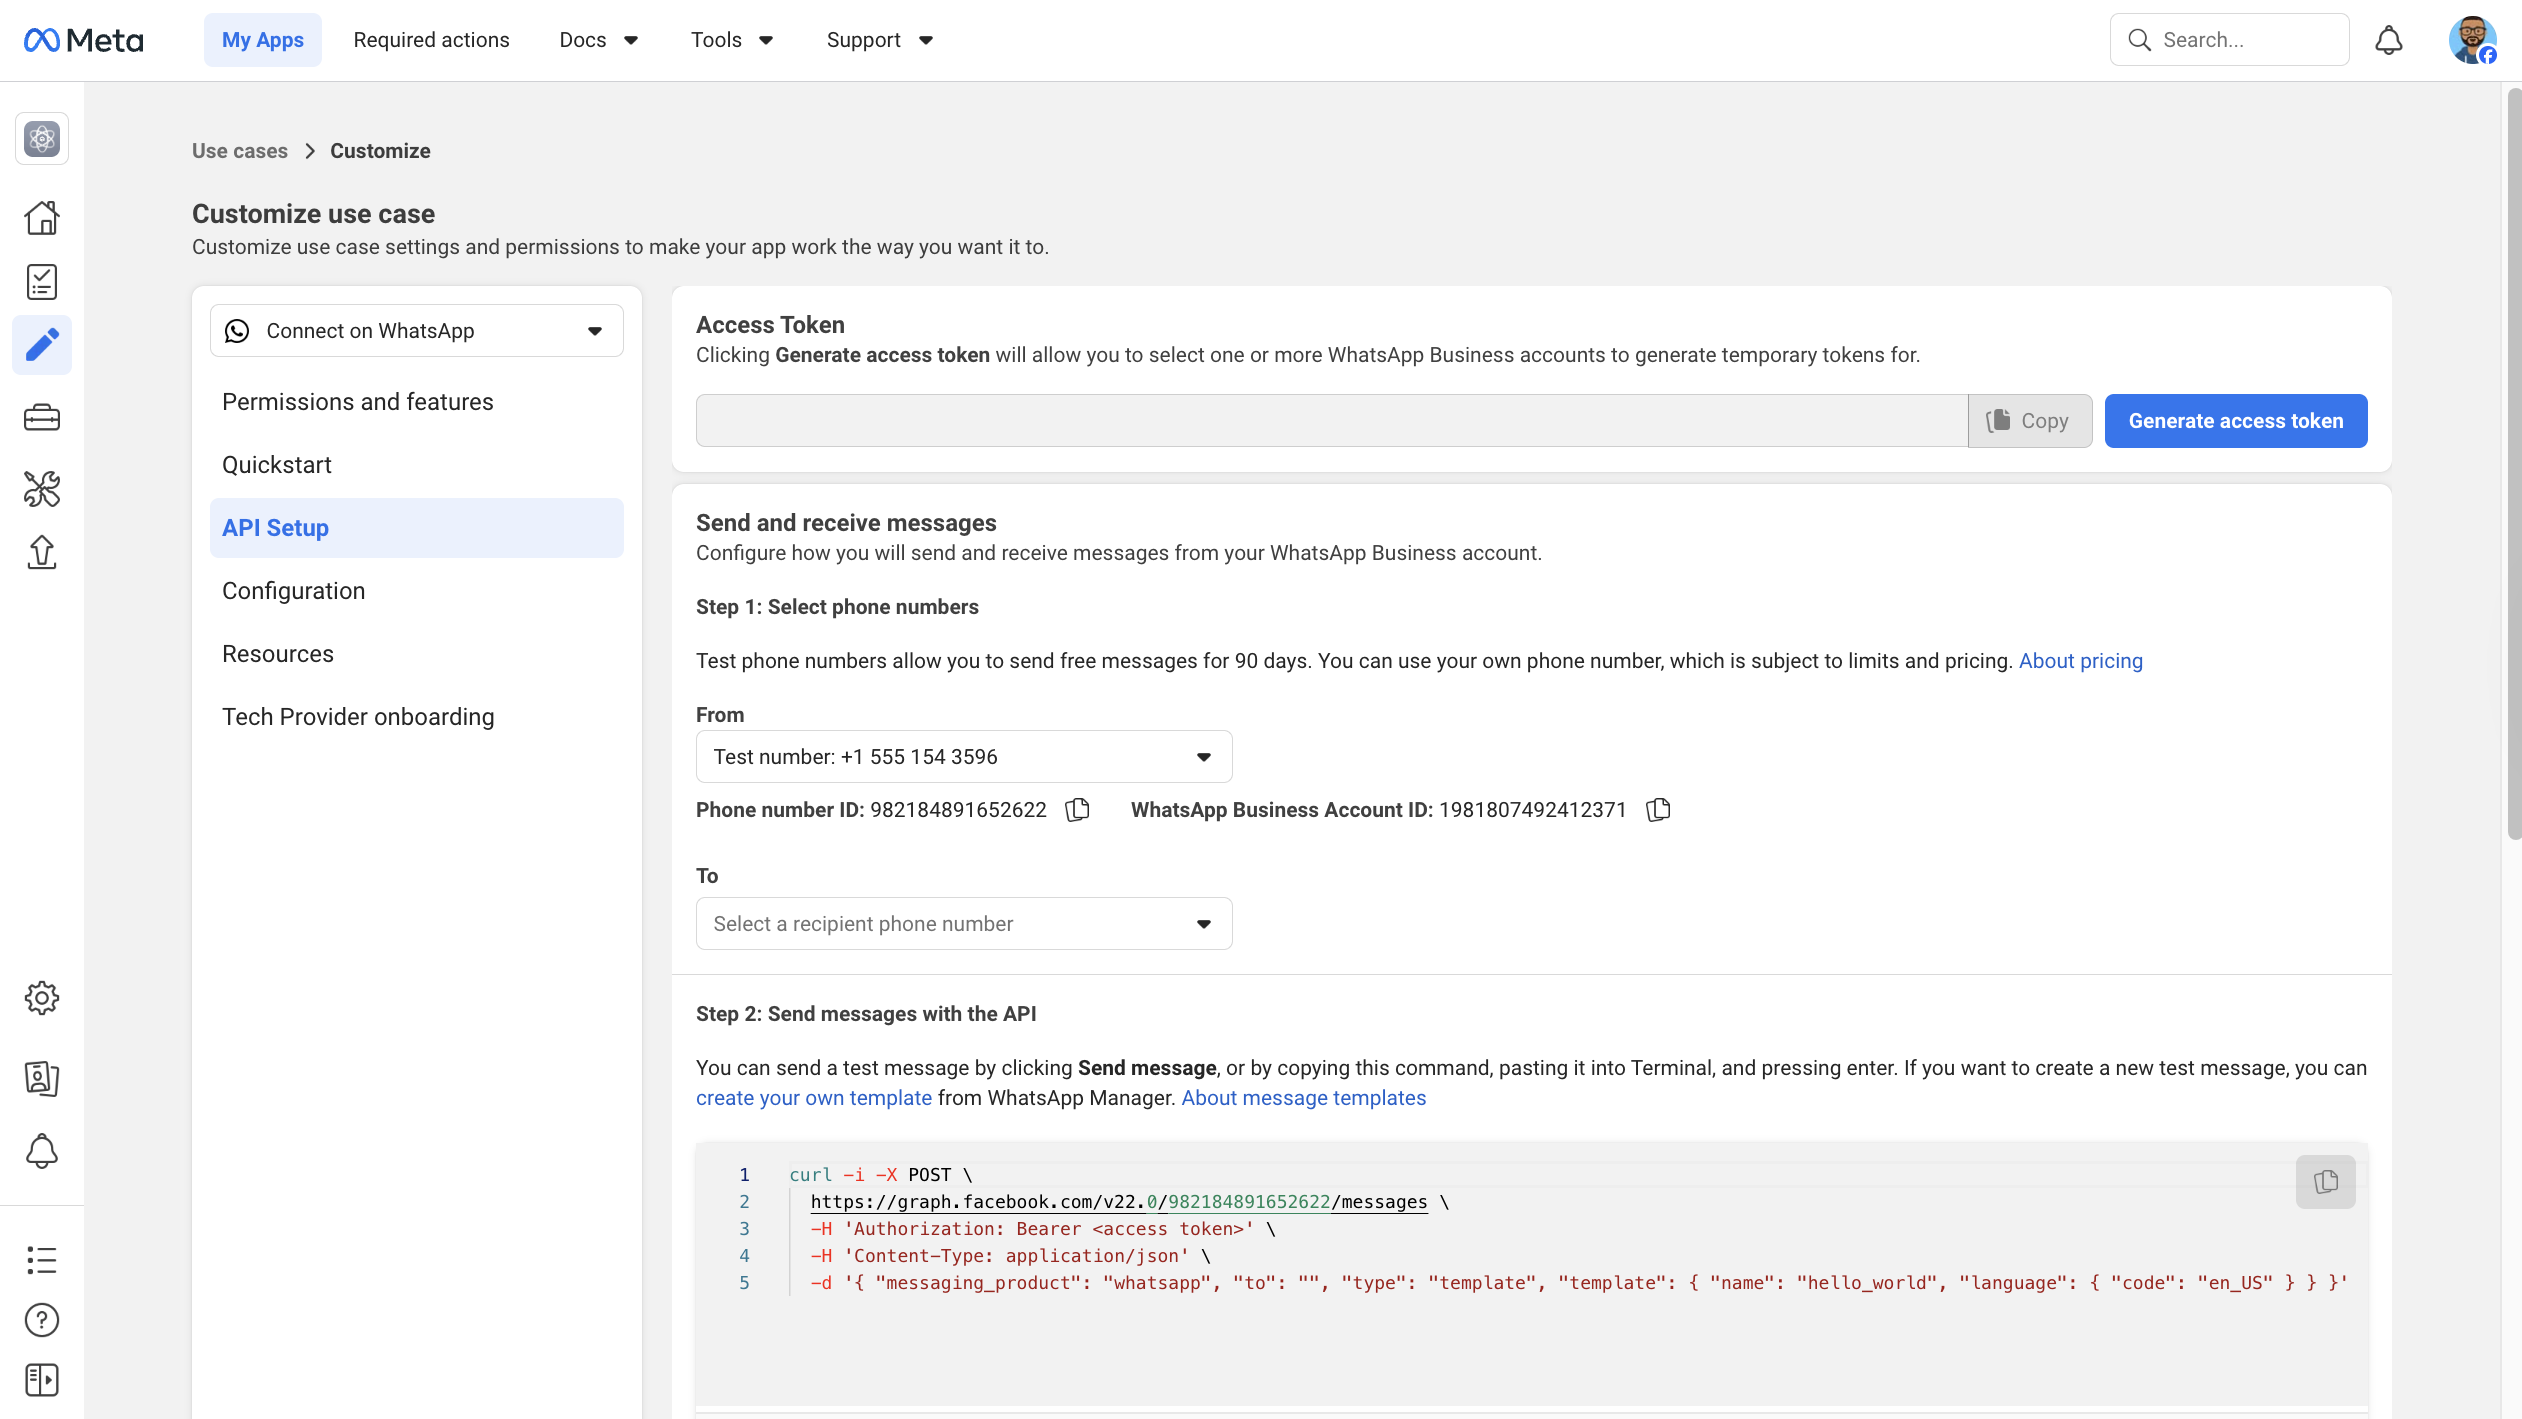
Add a phone number to the recipients list.
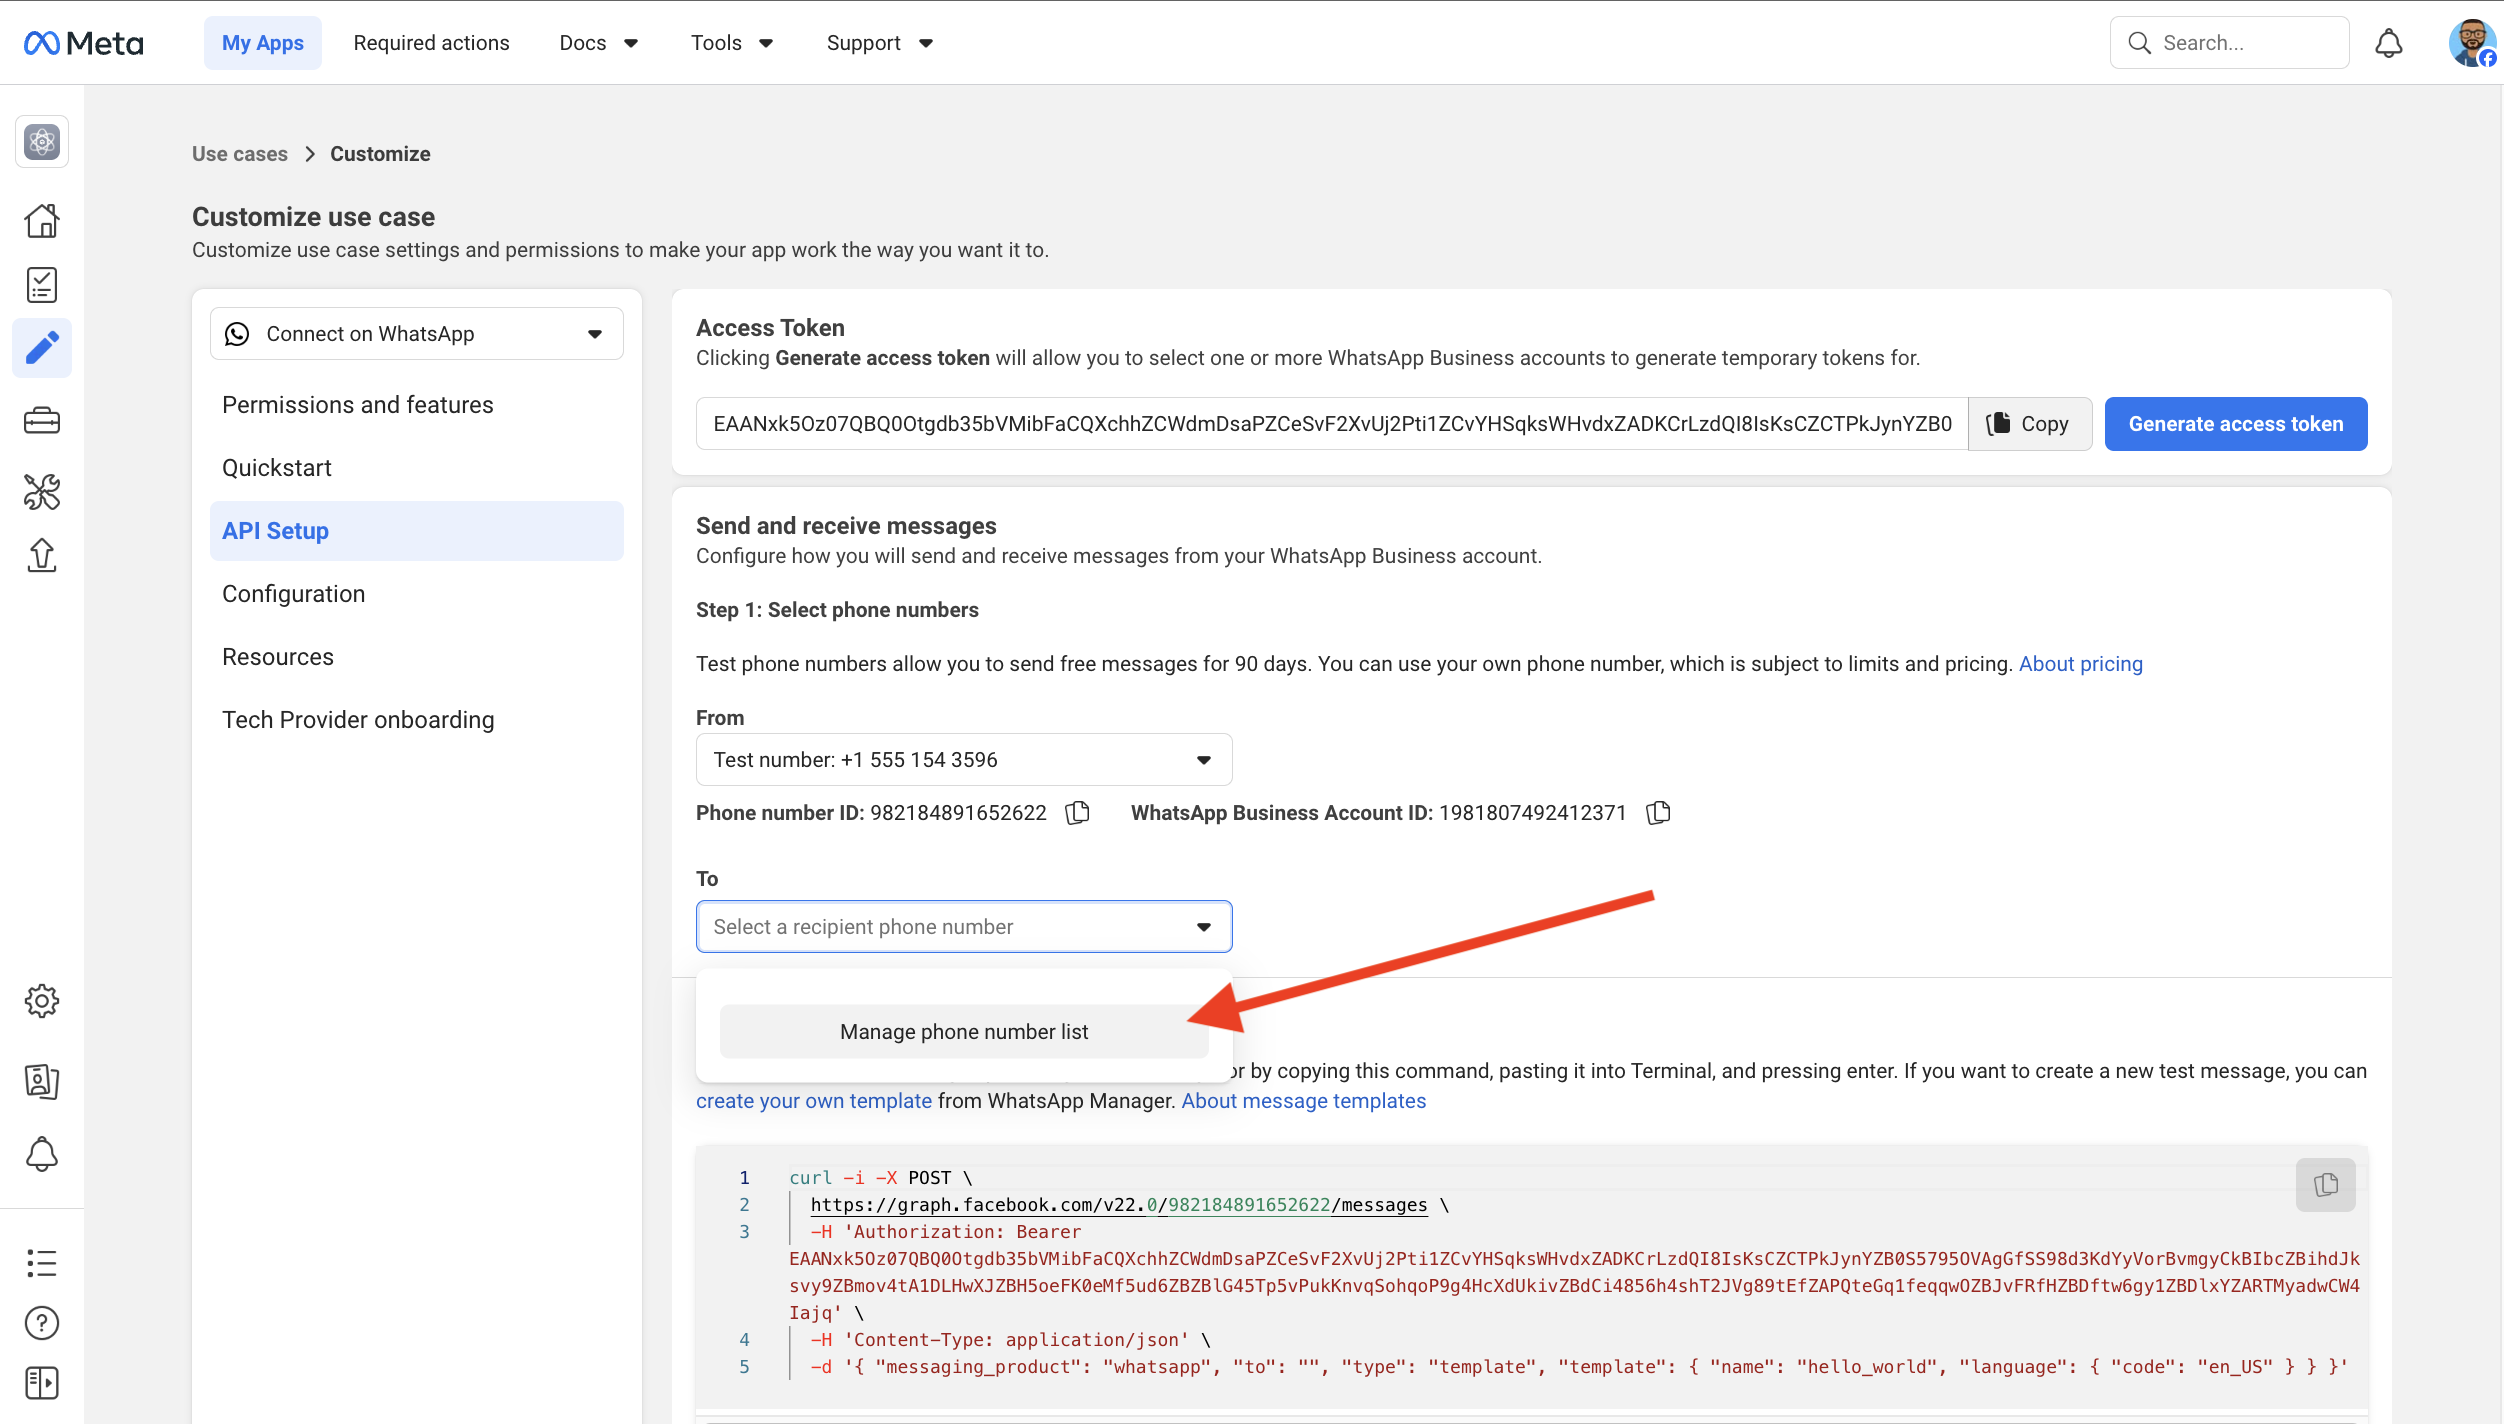
Click Send message to test the API. You should receive a message on your test phone number.

Next, select Quickstart from the sidebar menu and click Message Templates.
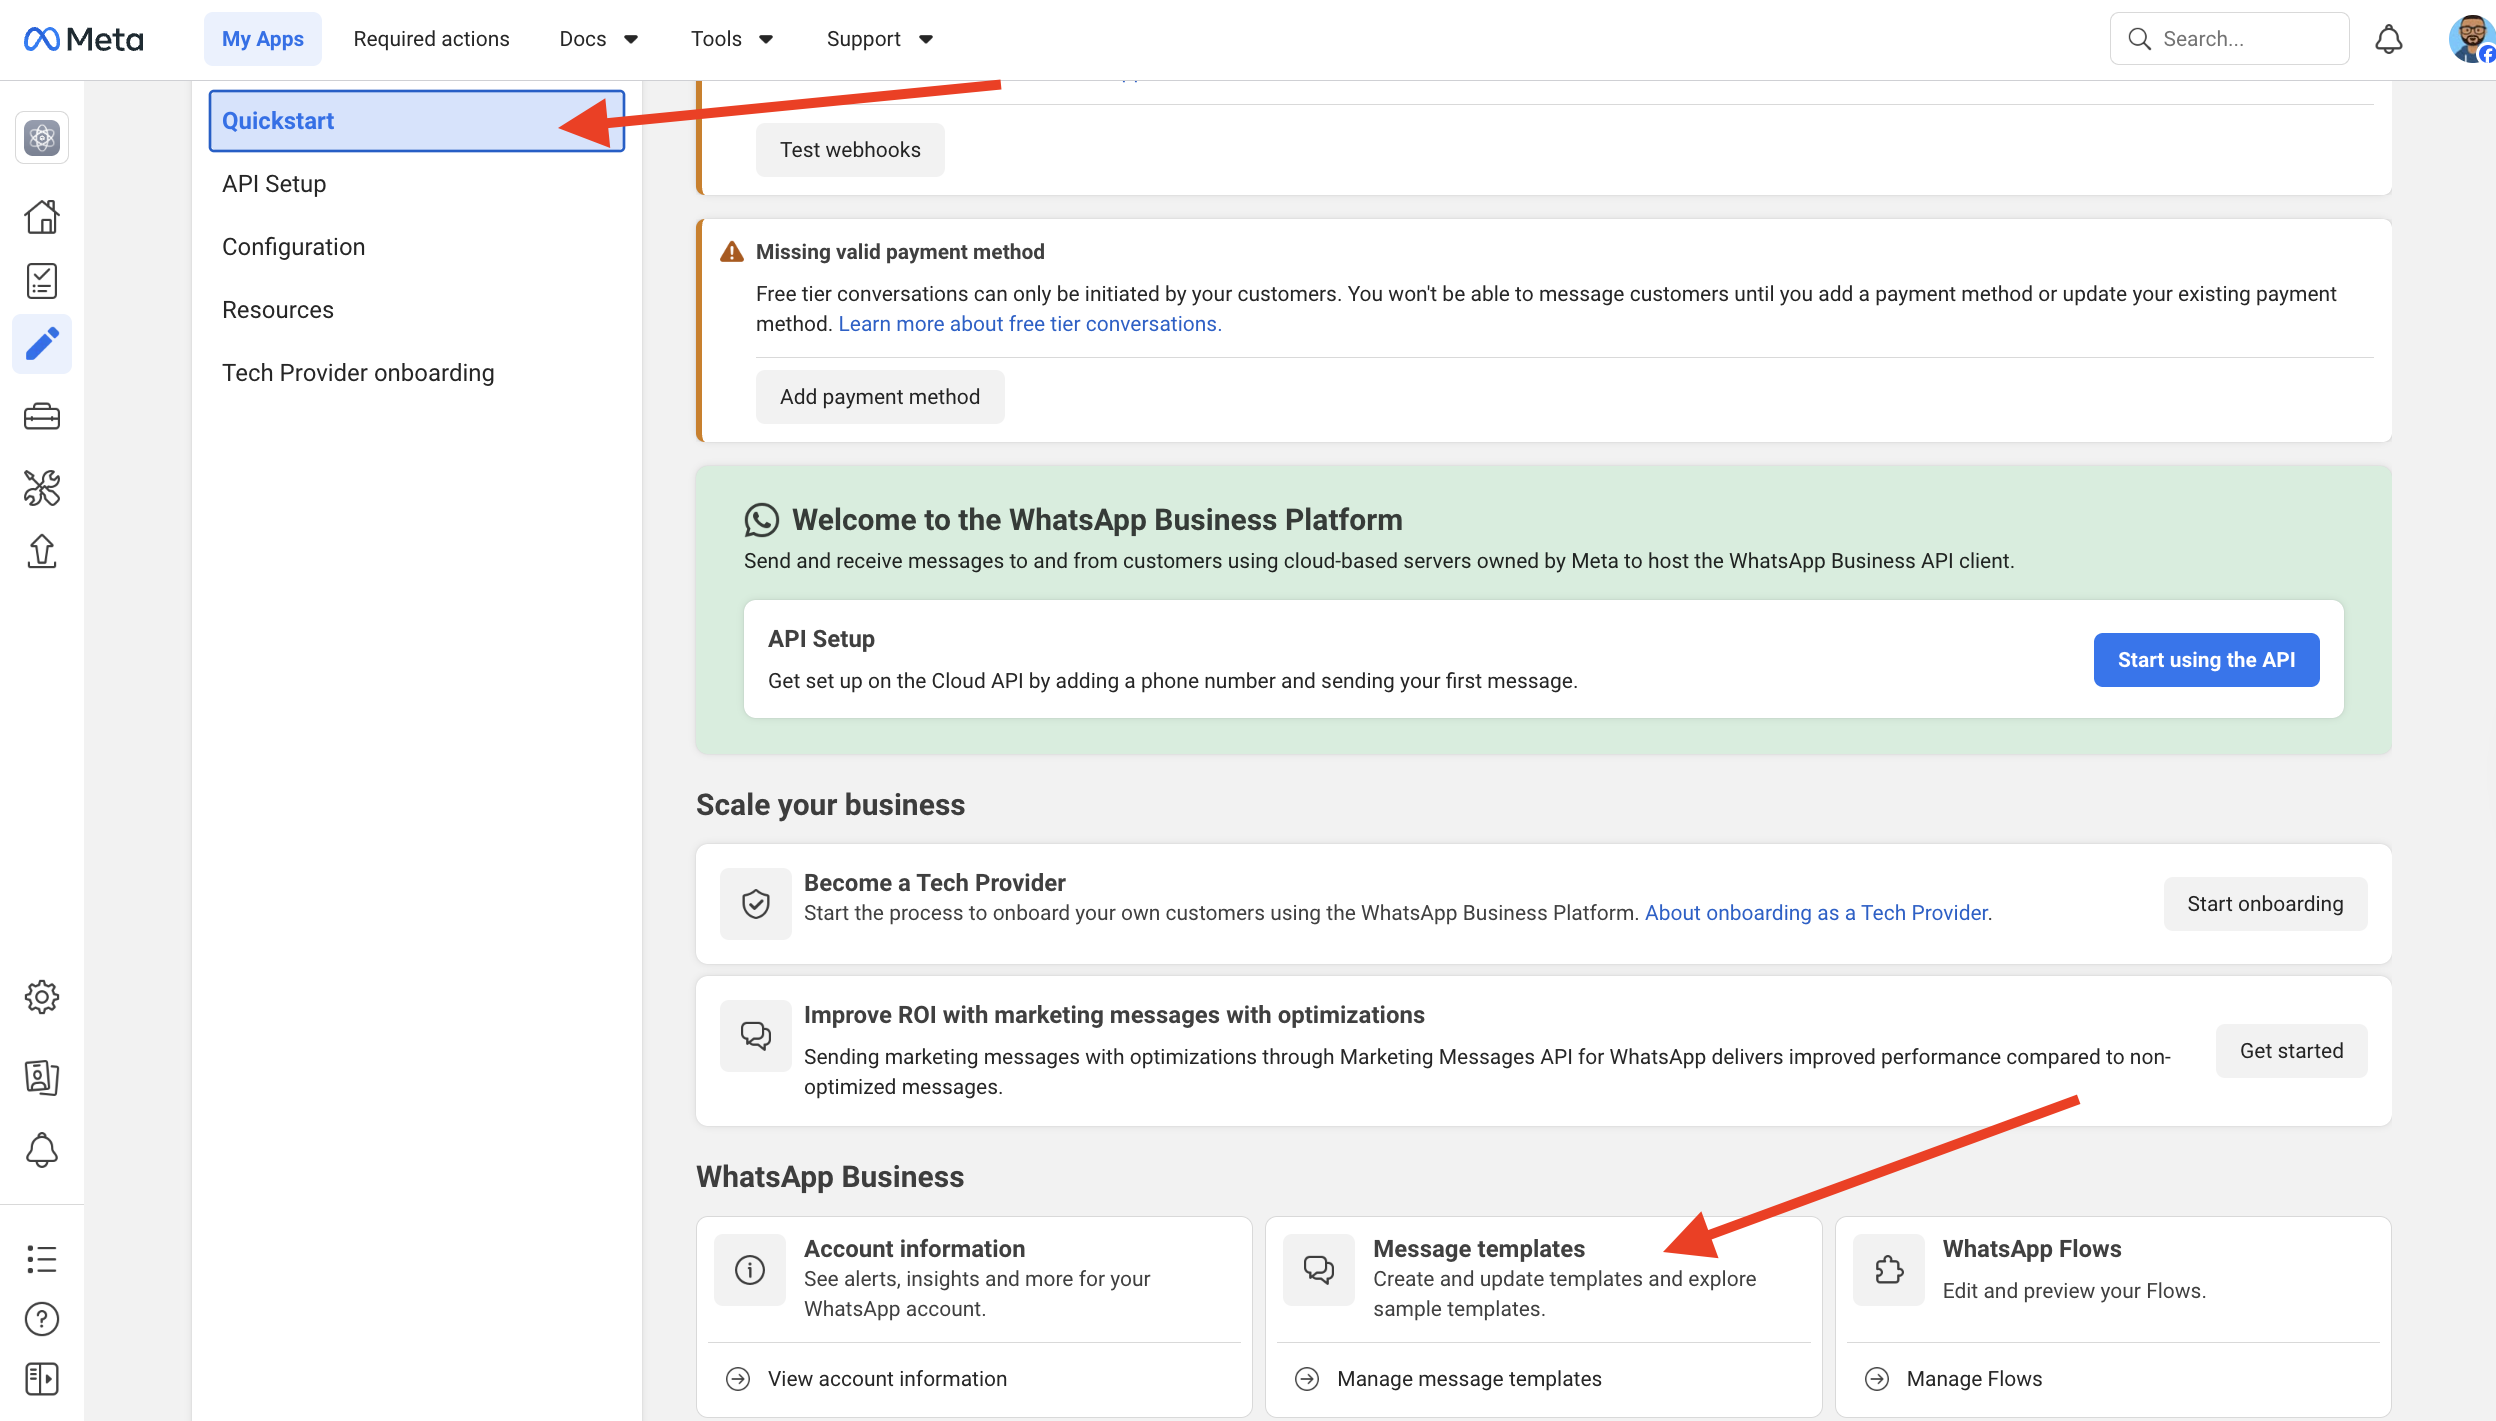
WhatsApp sends messages using templates. Templates allow you to create structured messages with placeholders (variables) that can be dynamically filled with user-specific data.
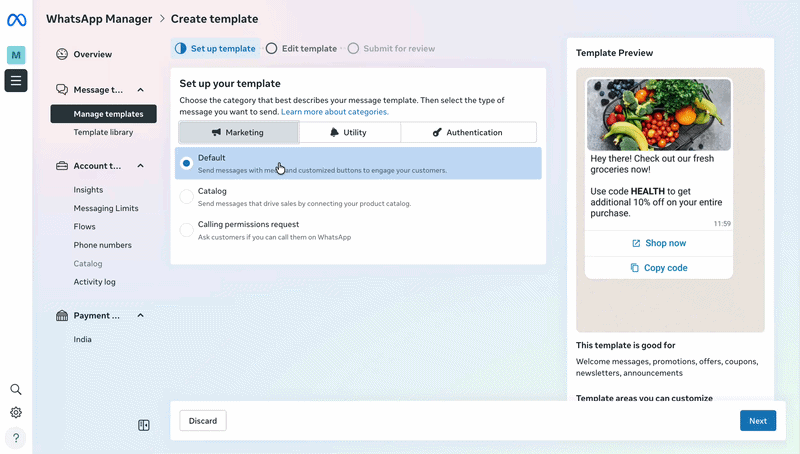
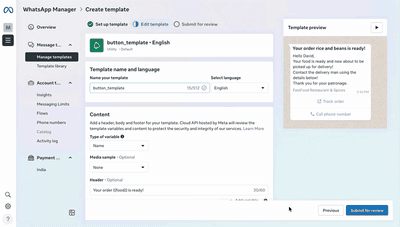
Finally, create a new template by adding content, buttons, and variables. This allows you to build reusable and customisable message templates.
How to send WhatsApp messages with Node.js
In this section, you will learn how to integrate the WhatsApp API with Node.js to send text, media, interactive, and template messages directly from your application.
First, create a folder to hold your project files.
mkdir whatsapp-api
cd whatsapp-api
Run the following code snippet to create a package.json file within the project folder.
npm init -y
Next, install the project dependencies. We will use Axios for making HTTP requests to the WhatsApp API, Dotenv for managing environment variables securely, and Form-data to handle multipart form data when sending media or template messages.
npm install axios dotenv form-data
Create an index.js file within the project folder and import the newly installed packages into the file.
require("dotenv").config();
const FormData = require("form-data");
const axios = require("axios");
const fs = require("fs");
Add a .env file inside your project folder and add your credentials as environment variables.
WHATSAPP_TOKEN=<your_access_token>
WHATSAPP_PHONE_NUMBER_ID=<your_phone_number_ID>
WHATSAPP_RECIPIENT_PHONE_NUMBER=<recipient_whatsapp_number>
You can run your application at any time using the following command:
node index.js
Congratulations, your setup is complete!
Code integration examples
Add the following code snippet to the index.js file to send message templates directly from the application.
async function sendTemplateMessage() {
	const response = await axios({
		url: `https://graph.facebook.com/v22.0/${process.env.WHATSAPP_PHONE_NUMBER_ID}/messages`,
		method: "post",
		headers: {
			Authorization: `Bearer ${process.env.WHATSAPP_TOKEN}`,
			"Content-Type": "application/json",
		},
		data: JSON.stringify({
			messaging_product: "whatsapp",
			to: `${process.env.WHATSAPP_RECIPIENT_PHONE_NUMBER}`,
			type: "template",
			template: {
				name: "hello_world",
				language: {
					code: "en_US",
				},
			},
		}),
	});

	console.log(response.data);
}

sendTemplateMessage();
The sendTemplateMessage function sends the default template to the recipient using the credentials stored in the environment variables.
You can also send text messages directly from the API using the function below:
async function sendTextMessage() {
	const response = await axios({
		url: `https://graph.facebook.com/v22.0/${process.env.WHATSAPP_PHONE_NUMBER_ID}/messages`,
		method: "post",
		headers: {
			Authorization: `Bearer ${process.env.WHATSAPP_TOKEN}`,
			"Content-Type": "application/json",
		},
		data: JSON.stringify({
			messaging_product: "whatsapp",
			to: `${process.env.WHATSAPP_RECIPIENT_PHONE_NUMBER}`,
			type: "text",
			text: {
				body: "This is a text message",
			},
		}),
	});

	console.log(response.data);
}

sendTextMessage();
The sendTextMessage function has a type attribute set to "text" and includes a text object for sending plain text messages.
How to send media (images, video, documents) via the WhatsApp API
The Cloud API supports four media types: image, video, audio, and document. You can attach media in two ways: by hosted URL, or by uploading the file to WhatsApp first and using the returned media ID.
| Method | When to use | Pros | Cons |
|---|---|---|---|
Hosted URL (link) | Image already lives on your CDN | One API call, no upload step | URL must be publicly reachable; WhatsApp caches it |
Uploaded ID (id) | Image lives on your server or user-uploaded | Faster repeated sends, private | Two API calls (upload + send) |
To send images with captions via hosted URL, update the type property as follows:
async function sendMediaMessage() {
	const response = await axios({
		url: `https://graph.facebook.com/v22.0/${process.env.WHATSAPP_PHONE_NUMBER_ID}/messages`,
		method: "post",
		headers: {
			Authorization: `Bearer ${process.env.WHATSAPP_TOKEN}`,
			"Content-Type": "application/json",
		},
		data: JSON.stringify({
			messaging_product: "whatsapp",
			to: `${process.env.WHATSAPP_RECIPIENT_PHONE_NUMBER}`,
			type: "image",
			image: {
				link: "https://dummyimage.com/600x400/000/c0a&text=hi",
				caption: "Hi! This is an image message.",
			},
		}),
	});

	console.log(response.data);
}

sendMediaMessage();
You can also send images stored on your local computer. First upload the image to the API, retrieve its media ID, then send using that ID.
const fs = require("fs");

async function uploadImage() {
	const data = new FormData();
	data.append("messaging_product", "whatsapp");
	data.append("file", fs.createReadStream(process.cwd() + "/image.png"), {
		contentType: "image/png",
	});
	data.append("type", "image/png");

	const response = await axios({
		url: `https://graph.facebook.com/v22.0/${process.env.WHATSAPP_PHONE_NUMBER_ID}/media`,
		method: "post",
		headers: {
			Authorization: `Bearer ${process.env.WHATSAPP_TOKEN}`,
		},
		data: data,
	});

	console.log(response.data);
}
The uploadImage function uploads a local image to the WhatsApp API and logs the image id to the console. Then send using that ID:
async function sendMediaMessageById() {
	const response = await axios({
		url: `https://graph.facebook.com/v22.0/${process.env.WHATSAPP_PHONE_NUMBER_ID}/messages`,
		method: "post",
		headers: {
			Authorization: `Bearer ${process.env.WHATSAPP_TOKEN}`,
			"Content-Type": "application/json",
		},
		data: JSON.stringify({
			messaging_product: "whatsapp",
			to: `${process.env.WHATSAPP_RECIPIENT_PHONE_NUMBER}`,
			type: "image",
			image: {
				id: "8954**********",
				caption: "Hi! This is an image message.",
			},
		}),
	});

	console.log(response.data);
}

sendMediaMessageById();
How to send a WhatsApp message in Python
If you prefer Python, the same Cloud API call looks like this with the requests library:
import os
import requests

url = f"https://graph.facebook.com/v22.0/{os.environ['WHATSAPP_PHONE_NUMBER_ID']}/messages"

headers = {
    "Authorization": f"Bearer {os.environ['WHATSAPP_TOKEN']}",
    "Content-Type": "application/json",
}

payload = {
    "messaging_product": "whatsapp",
    "to": os.environ["WHATSAPP_RECIPIENT_PHONE_NUMBER"],
    "type": "template",
    "template": {"name": "hello_world", "language": {"code": "en_US"}},
}

response = requests.post(url, headers=headers, json=payload)
print(response.json())
The same pattern works for text and media messages. Swap the type field to "text" or "image" and add the matching body.
Stop building social integrations from scratch.
One API call to publish, schedule, and manage posts across 15+ platforms.
Common WhatsApp API errors and how to fix them
| Error code | What it means | Fix |
|---|---|---|
(#131056) Recipient phone number not in allowed list | You haven't verified the recipient in your test app | Add the number under API Setup → Recipients |
(#132000) Number of parameters does not match template | Variable count in your payload doesn't match the approved template | Re-read the template body and count {{1}}, {{2}} placeholders |
(#131047) Re-engagement message | You're sending a free-form message outside the 24-hour service window | Switch to an approved template message |
(#131026) Message undeliverable | Recipient doesn't have WhatsApp, or hasn't accepted ToS | Verify the number on whatsapp.com/business/api before retrying |
(#133010) Phone number not registered | Your WhatsApp Business phone number isn't registered with Cloud API | Re-run the registration step in Meta Business Manager |
400 Bad Request with no specific code | Malformed JSON or wrong API version | Validate JSON; confirm you're using v22.0 or later |
When debugging, always log the full response body. WhatsApp returns useful error_data fields that get hidden if you only log the status code.
What's the easiest way to send WhatsApp messages?
Zernio gives you one API for WhatsApp and 13 other platforms. Instead of managing multiple APIs and authentication flows, you interact with a single interface that handles the platform-specific complexity for you.
In this section, you will configure Zernio for WhatsApp messaging and learn how to create, schedule, and send messages using its API and SDKs.
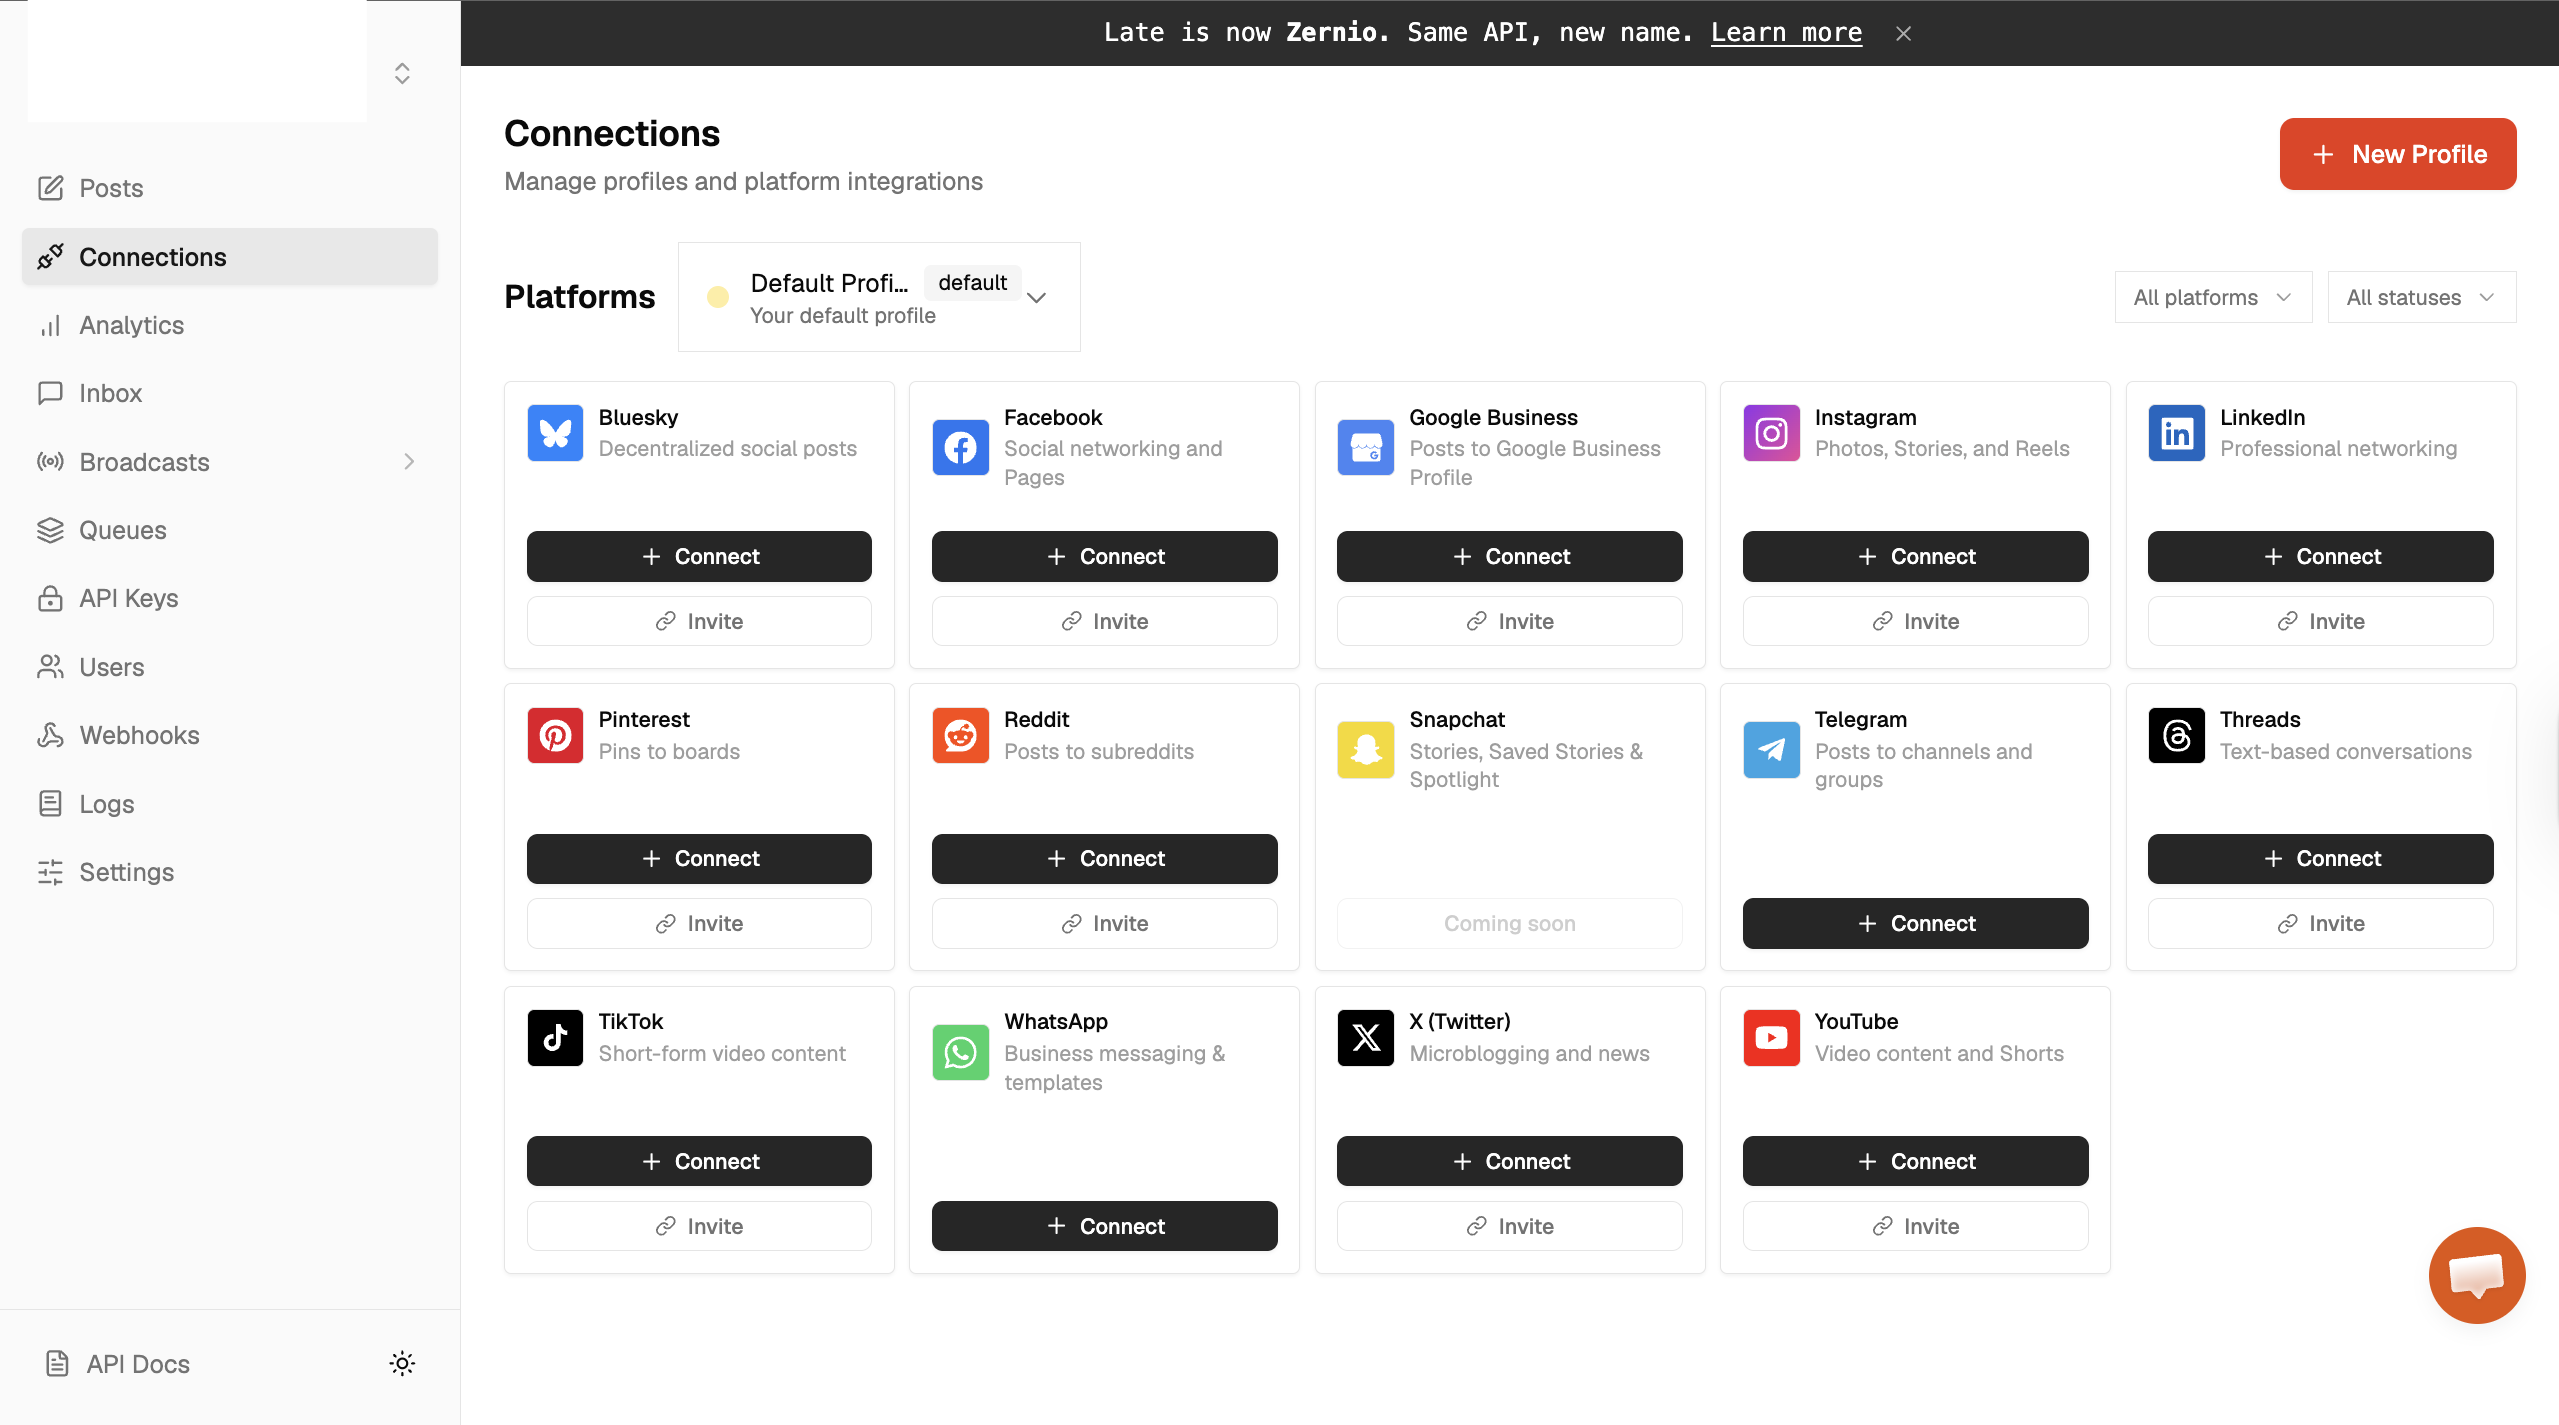
First, create a Zernio account and log into your dashboard.
Select Connections from the sidebar menu and connect your WhatsApp account to Zernio.
After clicking the WhatsApp Connect button, a pop-up appears where you can choose between getting a US number at a flat rate of $2 per month or connecting an existing WhatsApp Business account.
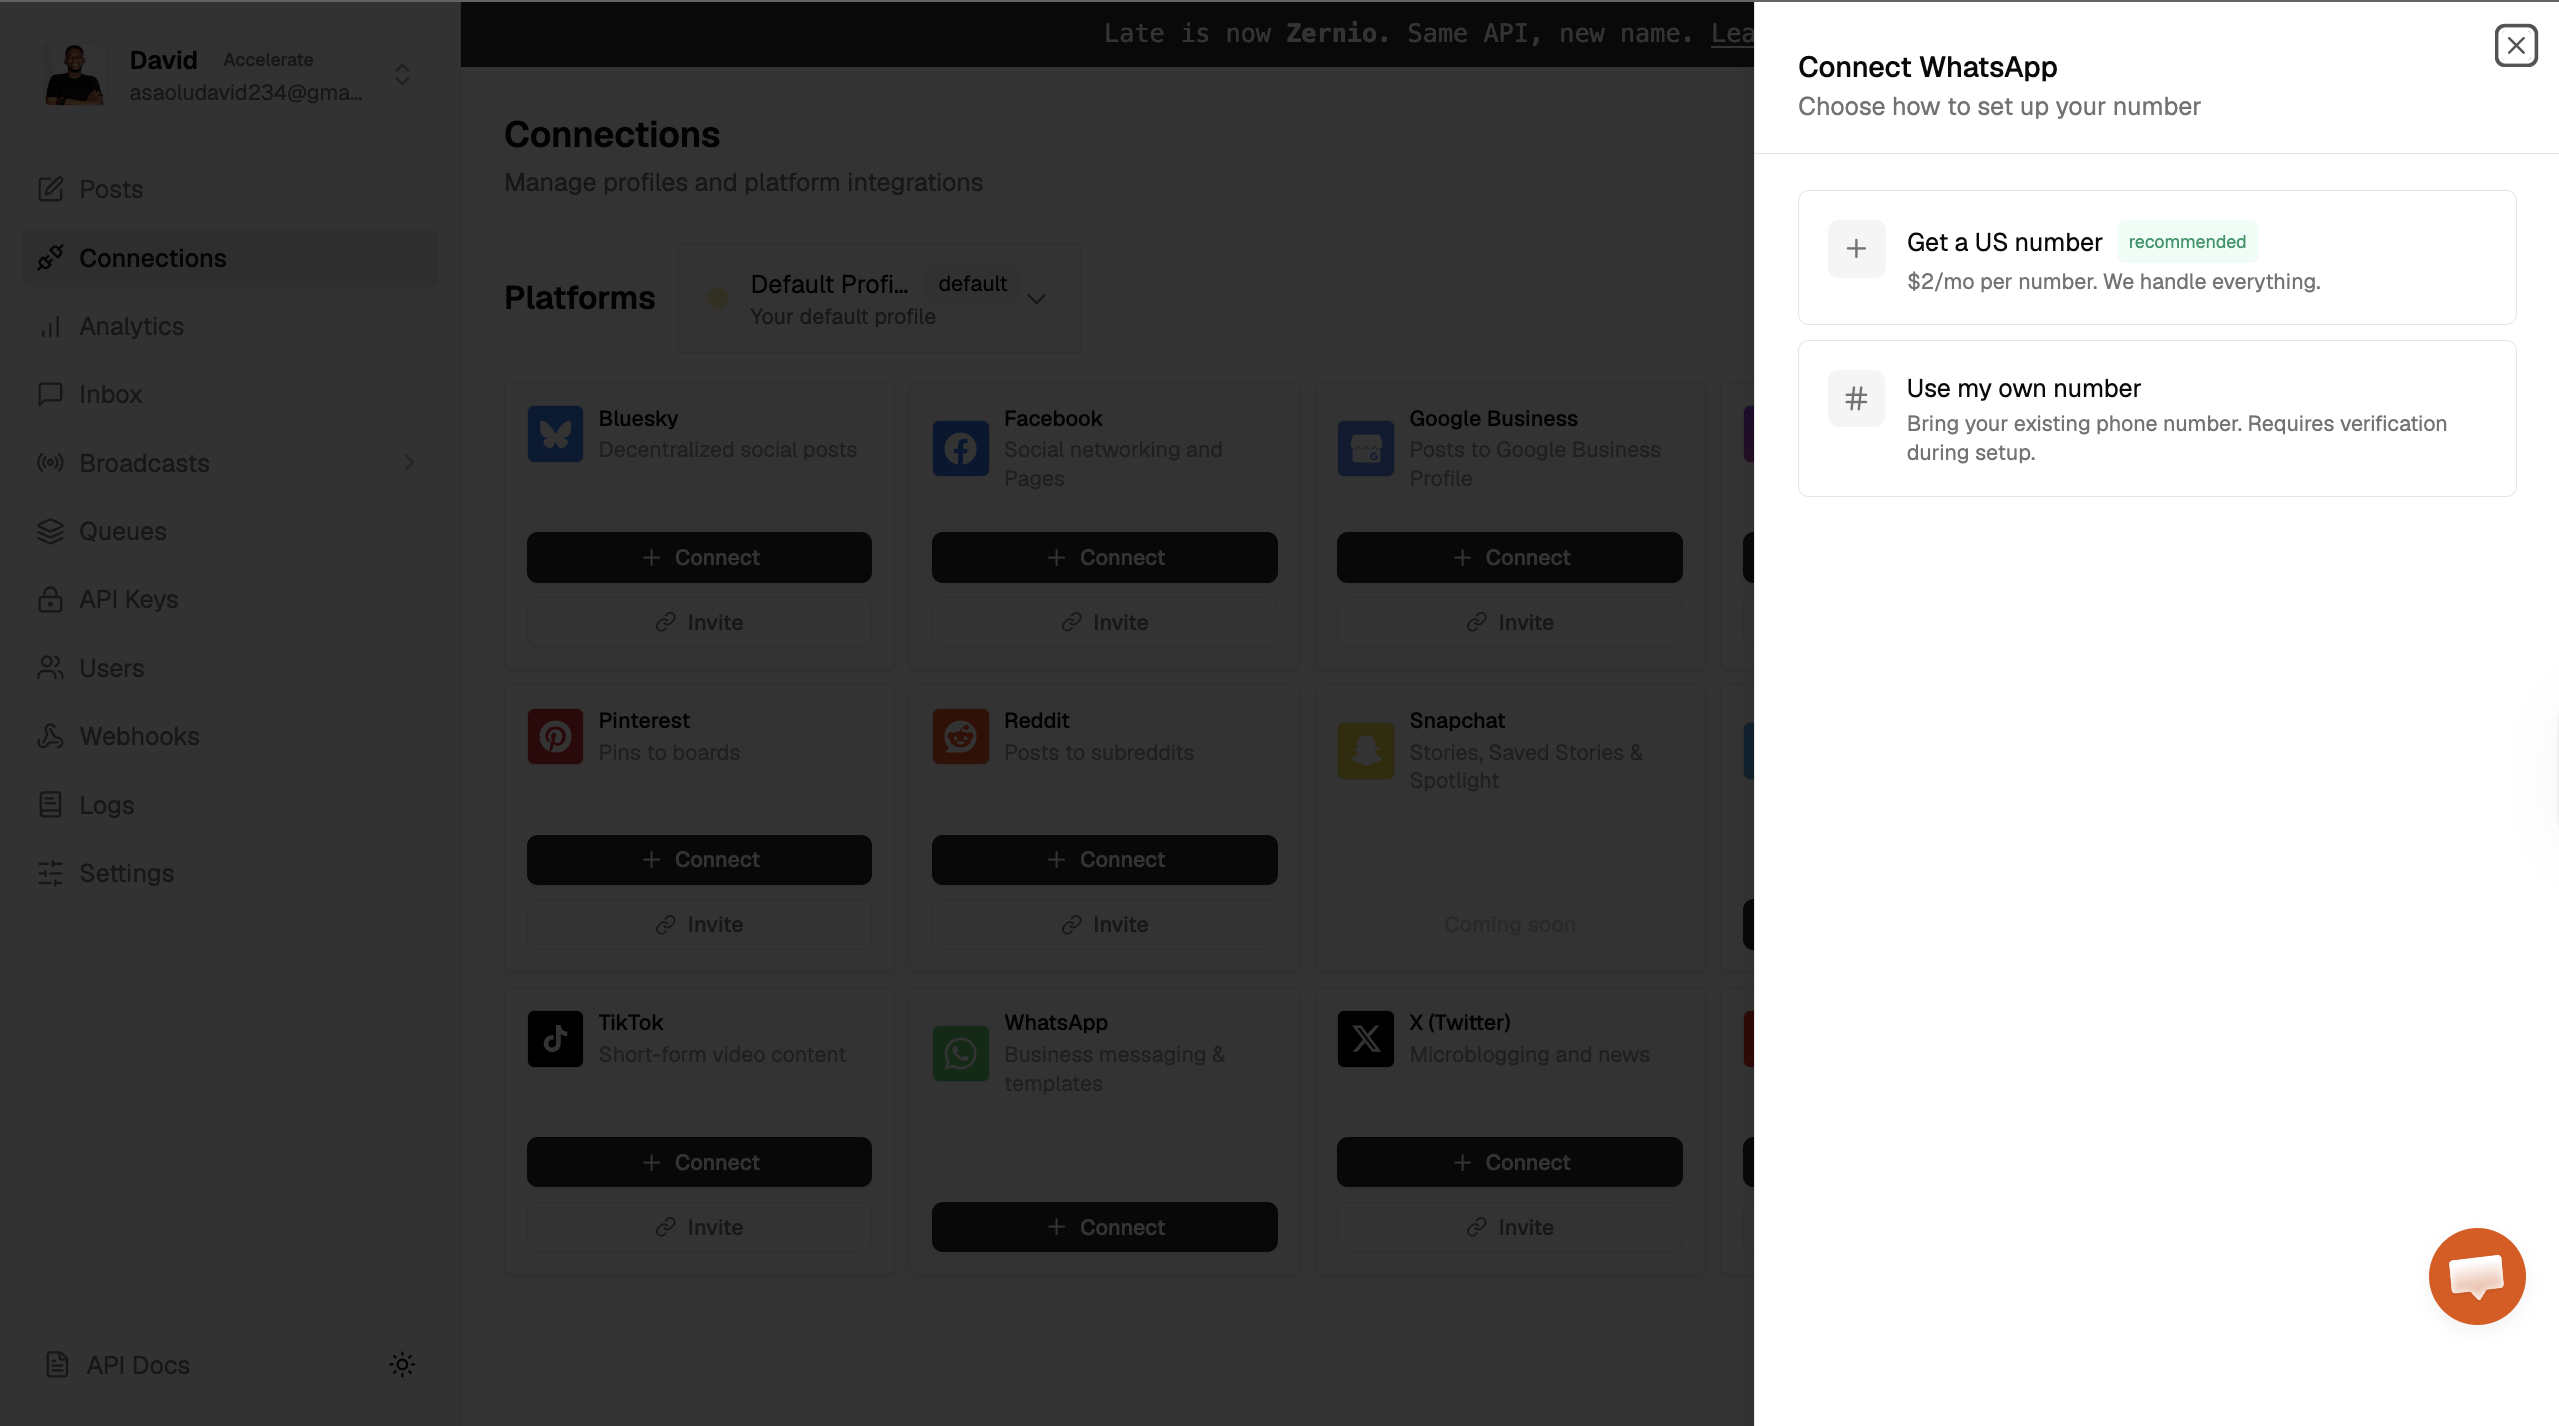
Select an option and connect your WhatsApp number to Zernio.
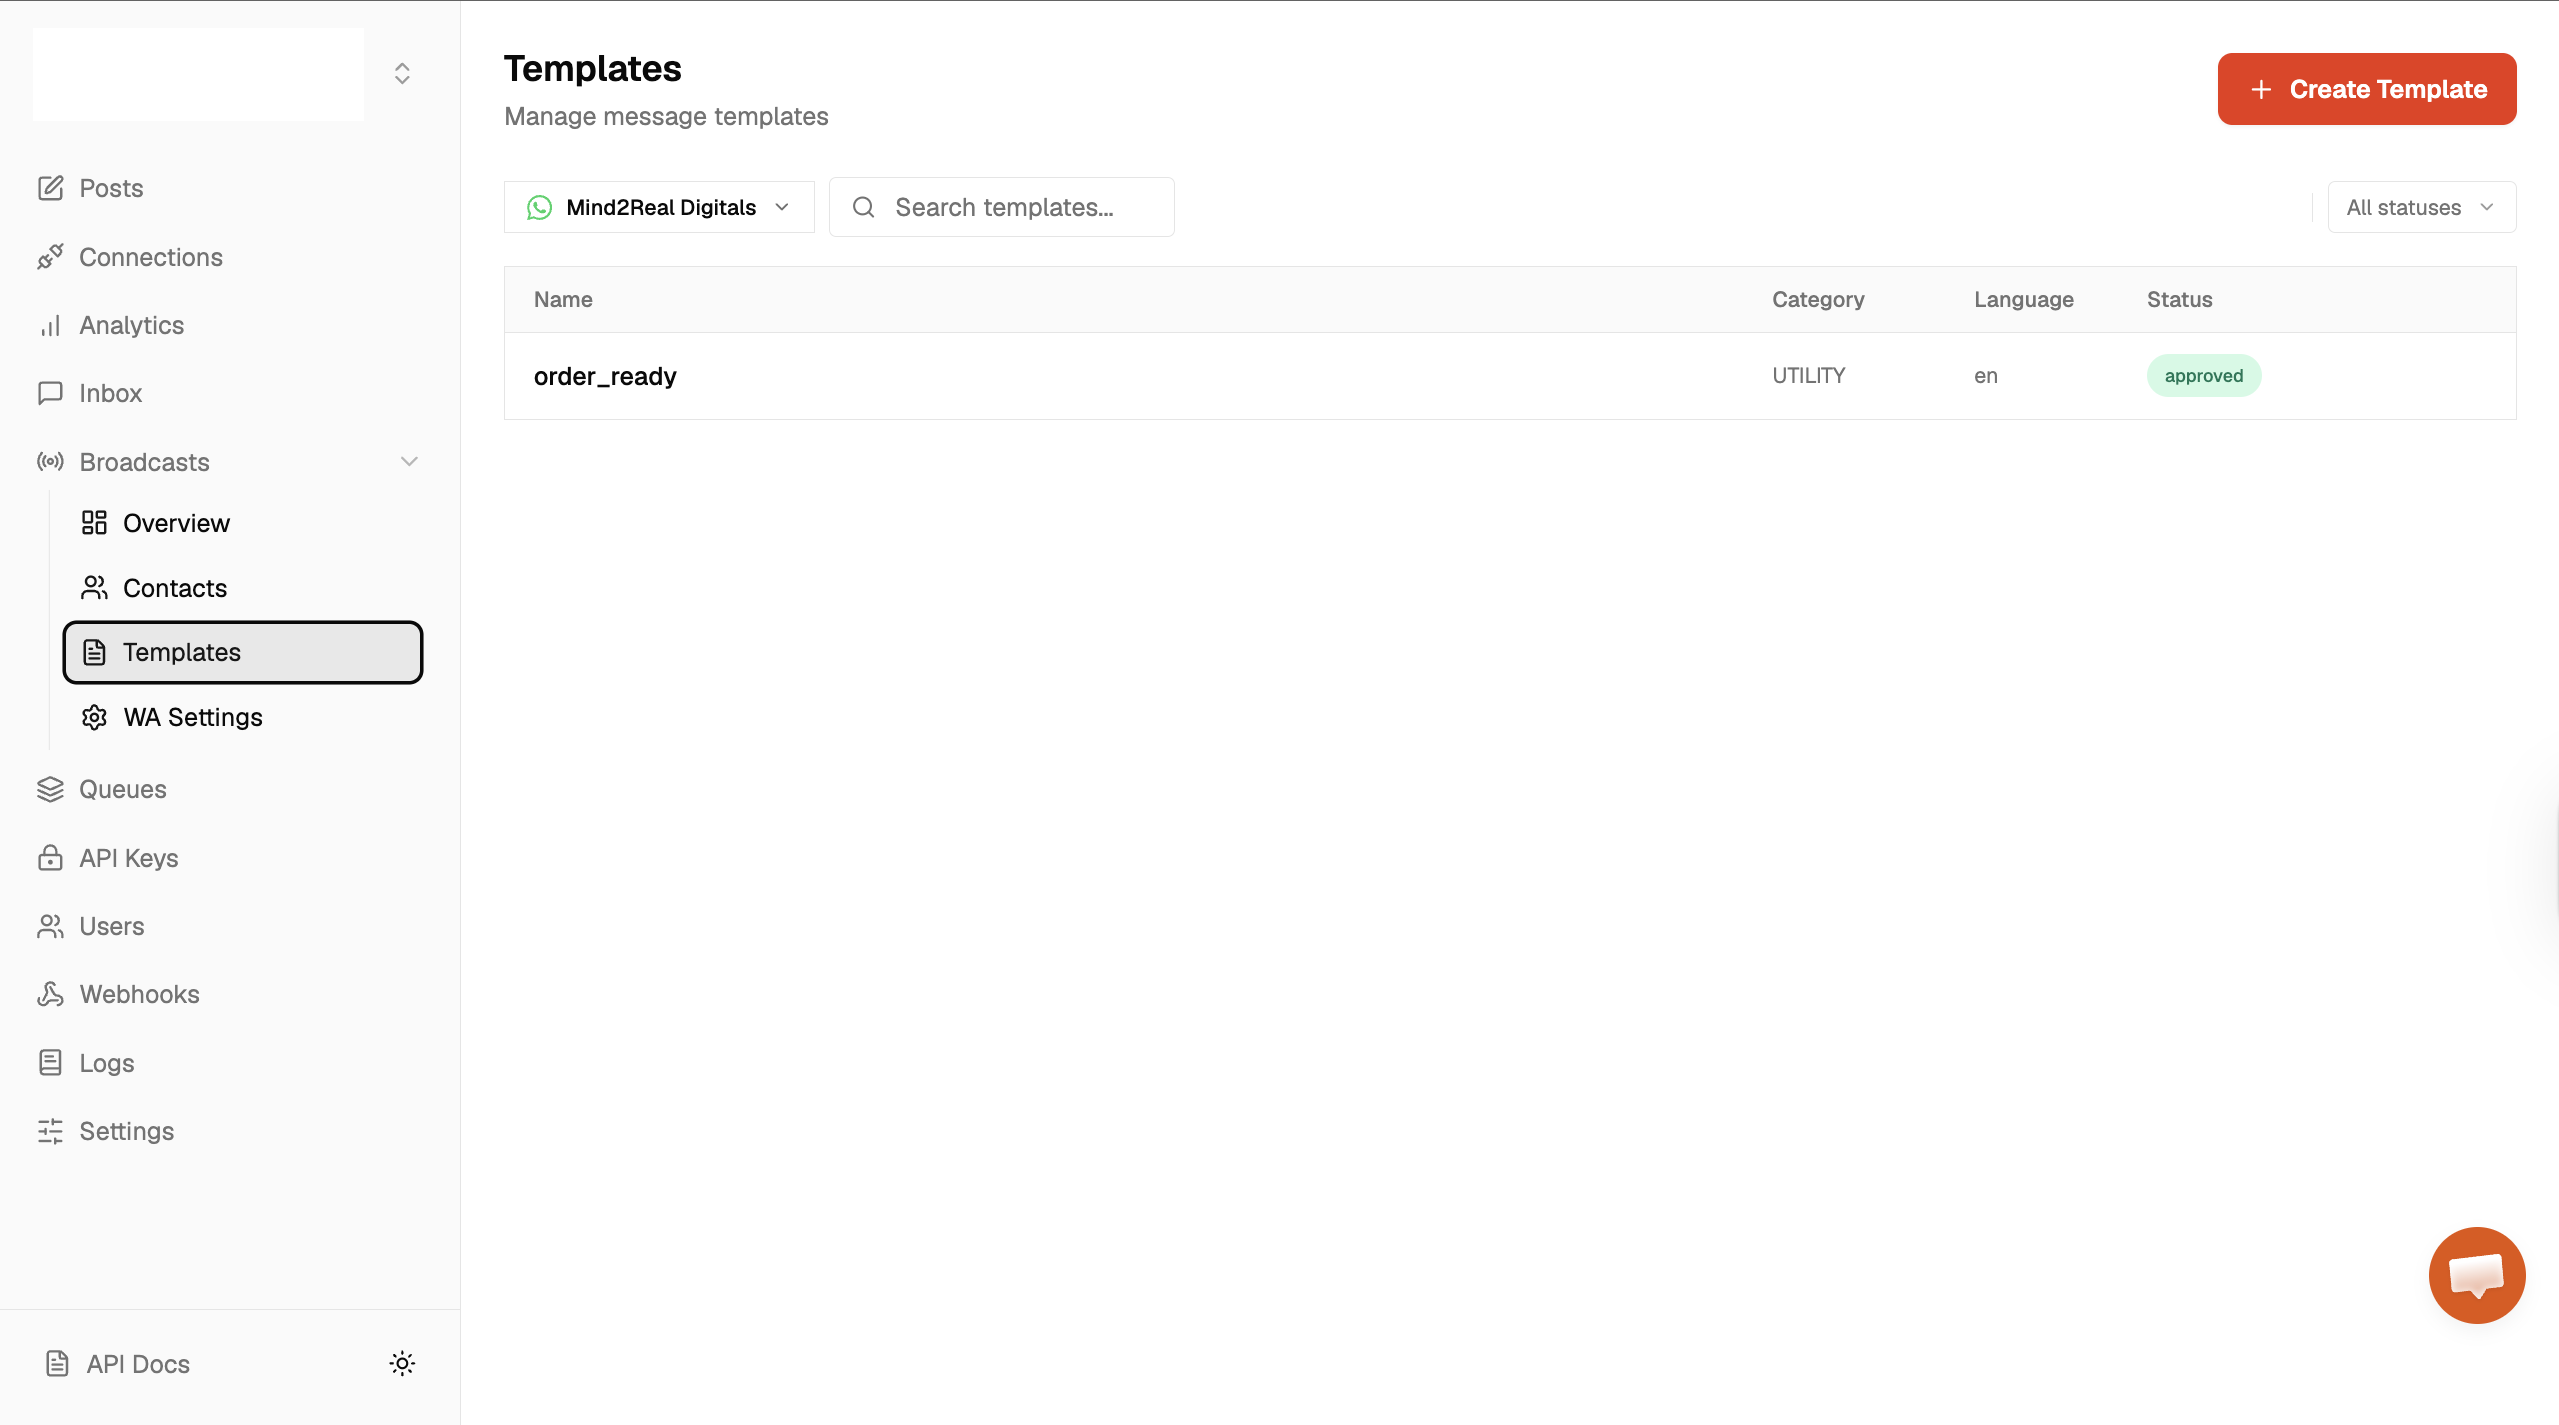
From the sidebar menu, select Broadcast > Templates to create a new WhatsApp template based on your messaging needs.
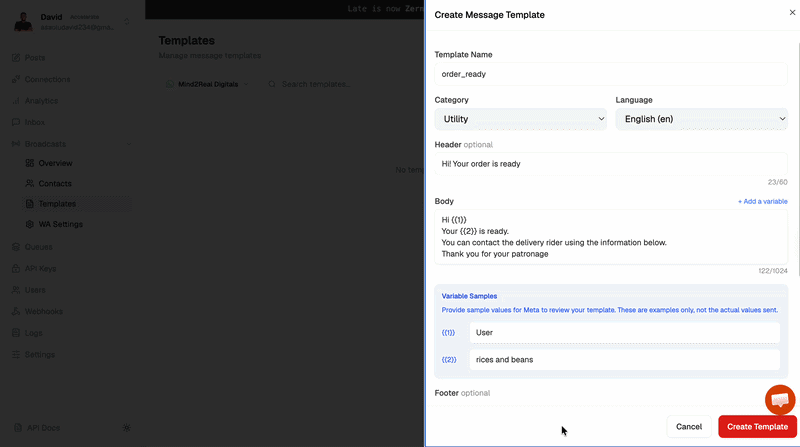
You may need to wait up to 24 hours for Meta to approve your template. Once approved, you can start sending messages to your customers or contacts.
Configuring the Zernio API and Node.js SDK
Before we proceed, copy your Zernio API key and WhatsApp account ID and save them into environment variables in the .env file.
ZERNIO_API_KEY=<your_api_key>
ZERNIO_WHATSAPP_ACCOUNT_ID=<WhatsApp_account_ID>
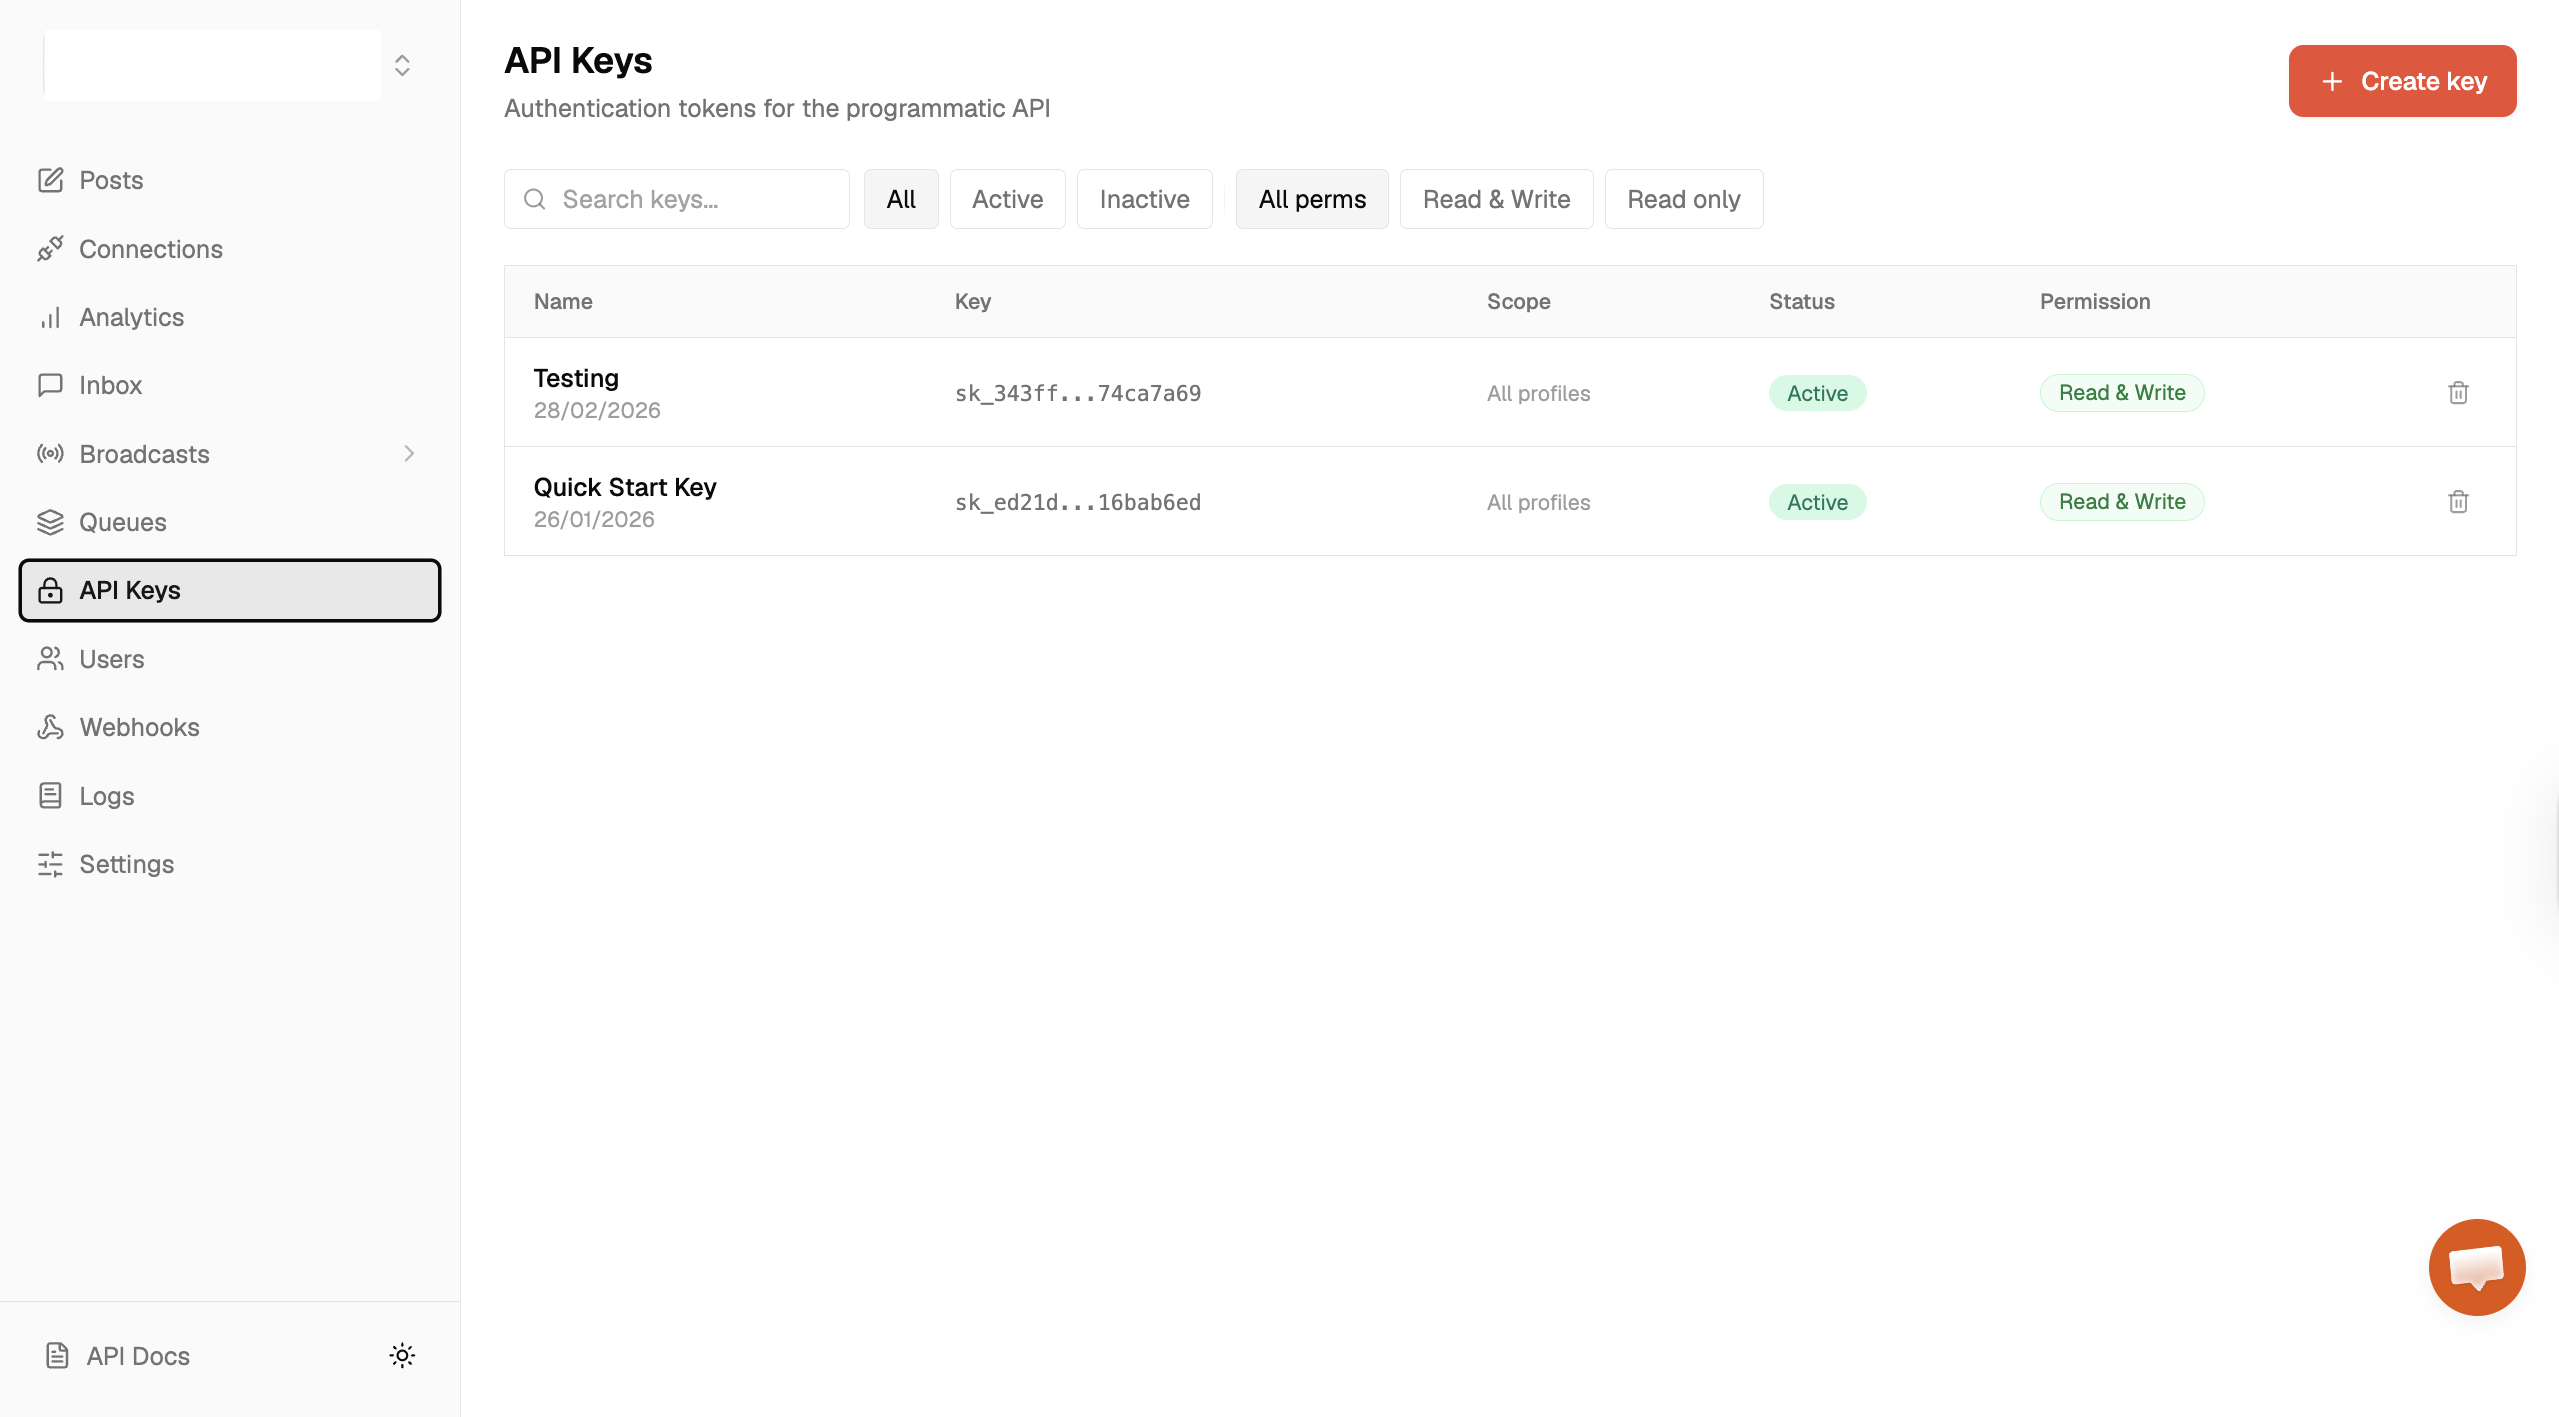
Select API keys from the sidebar menu to create a new API key.
Click the Copy icon under the WhatsApp connection to copy your account ID.

Next, install the Zernio Node.js SDK.
npm install @zernio/node
Finally, import it into the index.js file as shown below:
const Zernio = require("@zernio/node").default;
const zernio = new Zernio({ apiKey: process.env.ZERNIO_API_KEY });
Sending WhatsApp messages with the Zernio SDK
Zernio allows you to group your contacts or customers into broadcast lists, making it easy to send or schedule bulk messages. This is useful for sharing updates such as new arrivals, price changes, or other important information.
Using the existing whatsapp-api Node.js project, add the following code snippet to your index.js file.
async function sendWithZernio() {
const { data } = await zernio.whatsapp.sendWhatsAppBulk({
body: {
accountId: process.env.ZERNIO_WHATSAPP_ACCOUNT_ID,
recipients: [
{
phone: `${process.env.WHATSAPP_RECIPIENT_PHONE_NUMBER}`,
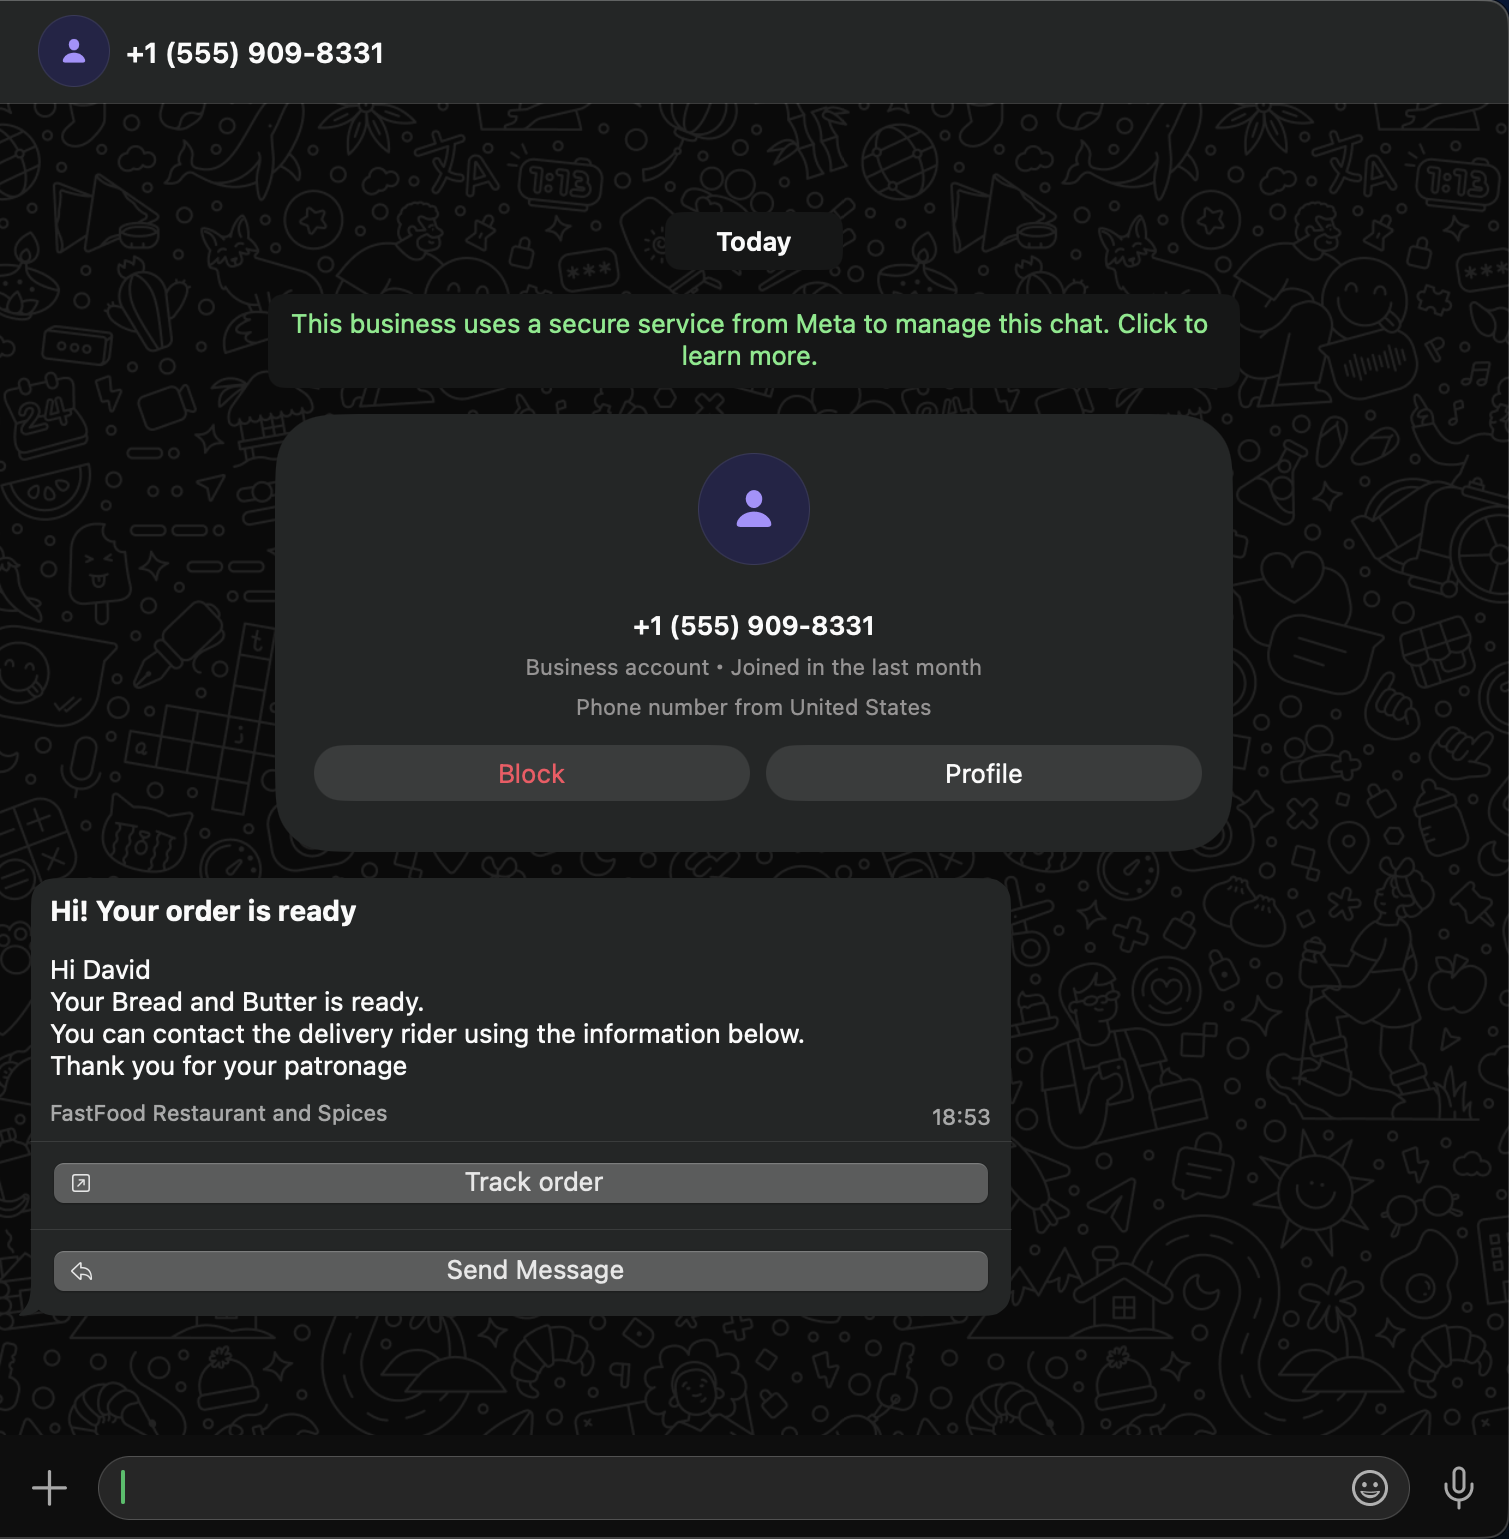
variables: { 1: "David", 2: "Bread and Butter" },
},
],
template: {
name: "order_ready",
language: "en",
},
},
});
console.log(`Sent: ${data.summary.sent}, Failed: ${data.summary.failed}`);
}
sendWithZernio();
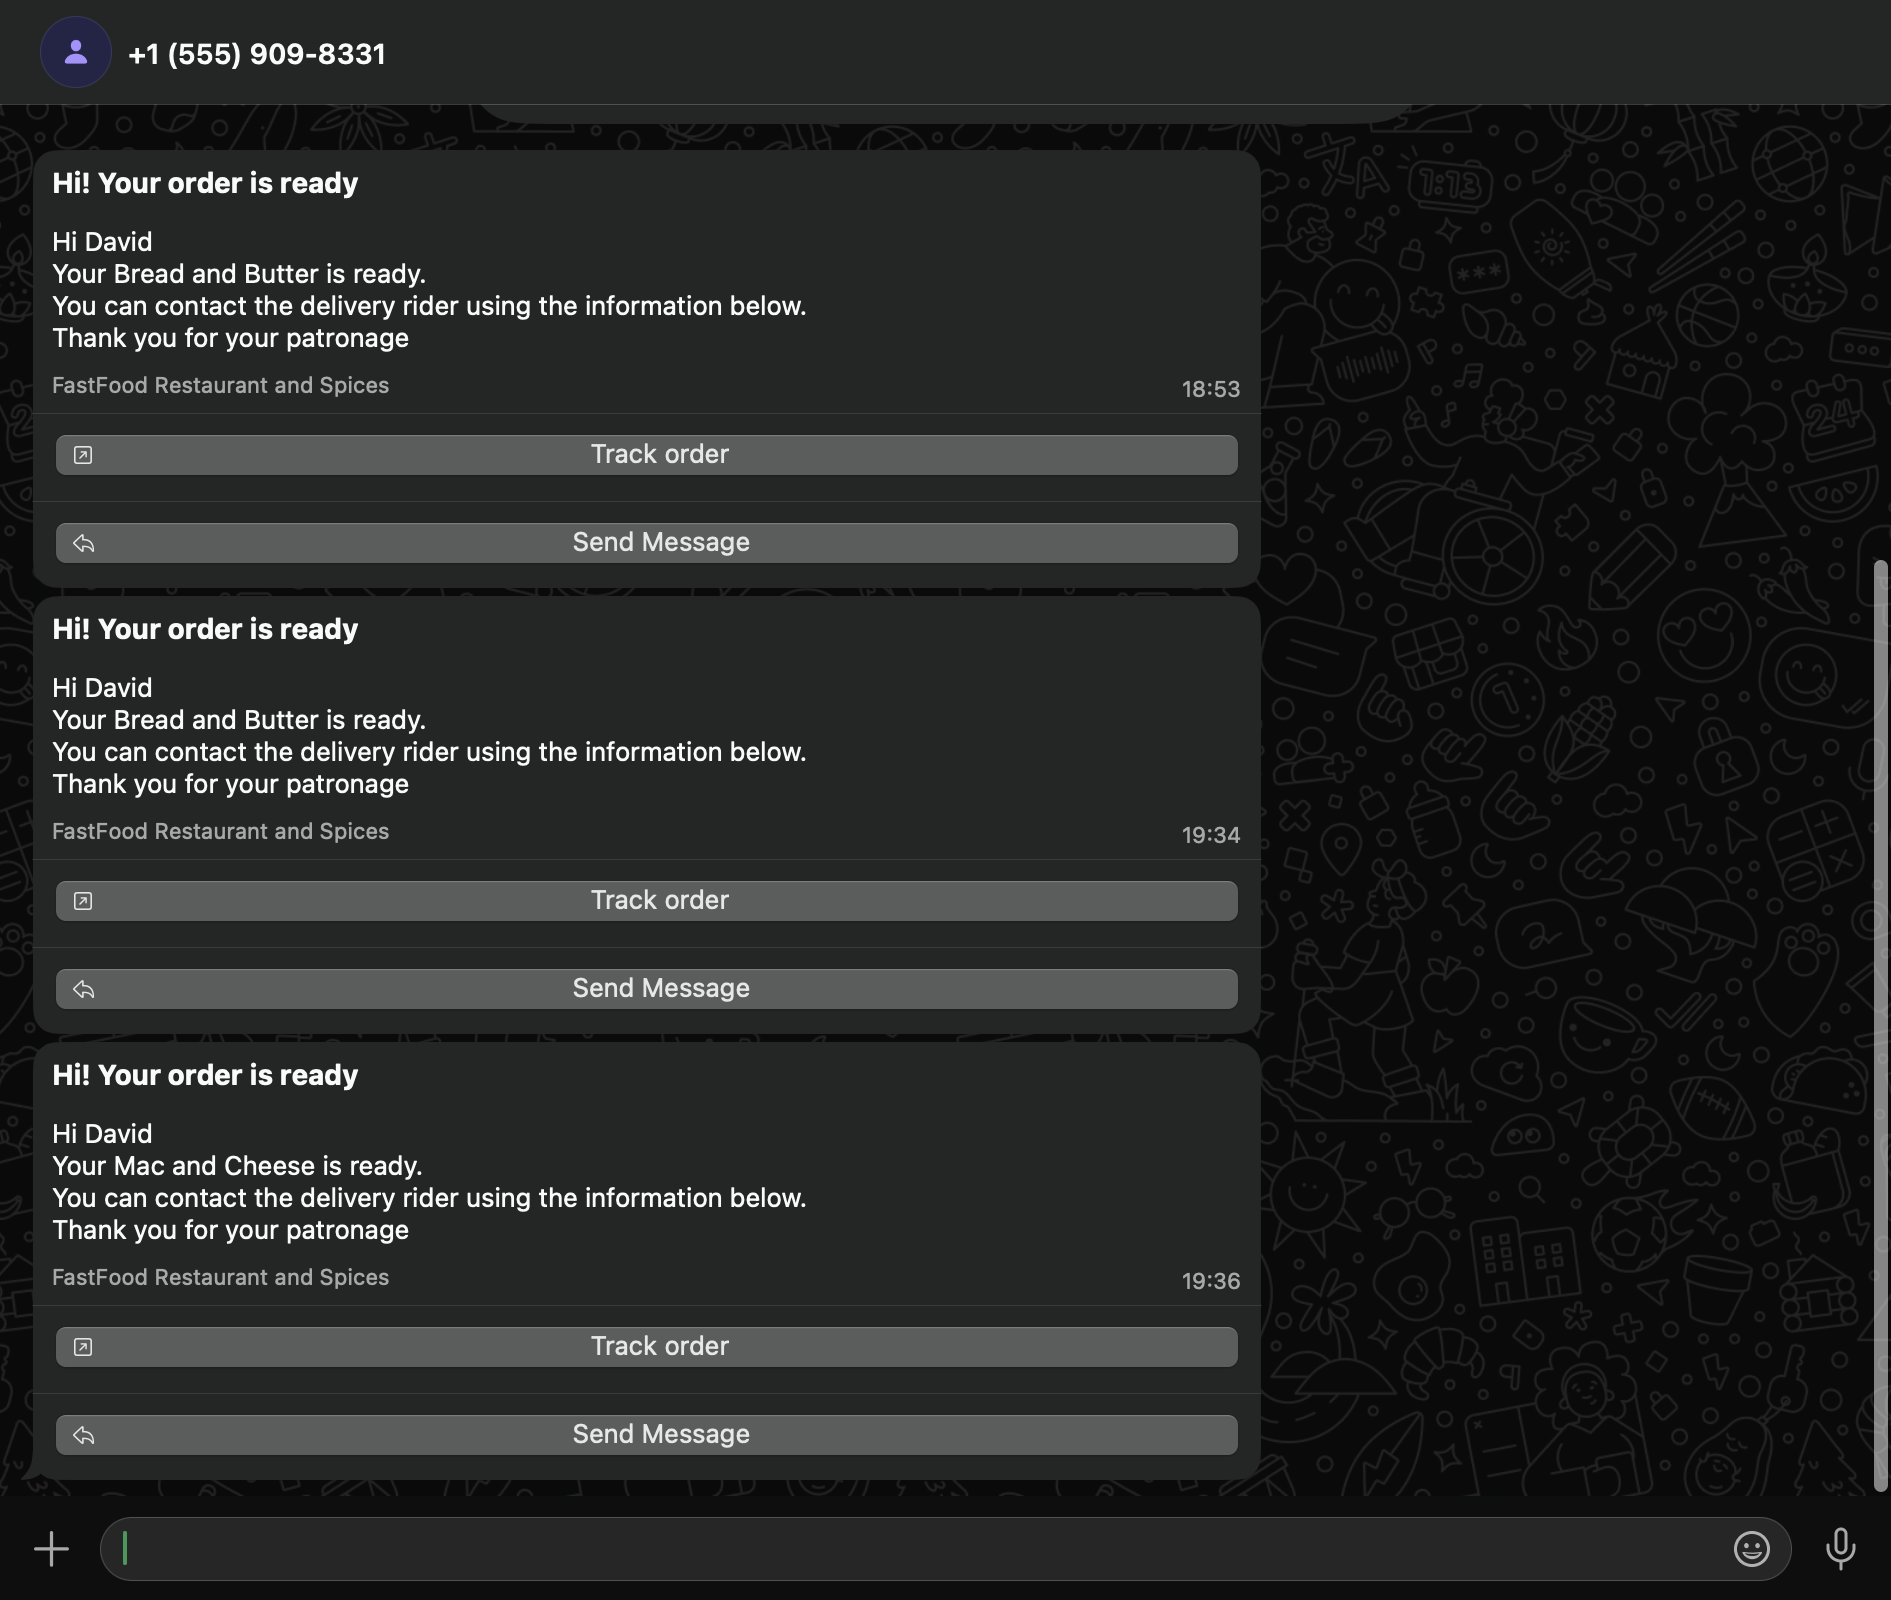
The sendWithZernio function uses the sendWhatsAppBulk method to send a template message to the phone numbers defined in the recipients array. It references the order_ready template and passes dynamic values through the variables object, which are inserted into the template before sending.
Once executed, the function sends the message to the specified contacts and logs a summary of successful and failed deliveries.
Next, let's create a WhatsApp broadcast to schedule and send messages to your contacts.
Add the following code snippet to create a new broadcast:
async function createBroadcastList() {
	const { data } = await zernio.whatsapp.createWhatsAppBroadcast({
		body: {
			accountId: process.env.ZERNIO_WHATSAPP_ACCOUNT_ID,
			name: "Monthly Newsletter",
			template: {
				name: "order_ready",
				language: "en",
				components: [
					{
						type: "body",
						parameters: [
							{ type: "text", text: "{{1}}" },
							{ type: "text", text: "{{2}}" },
						],
					},
				],
			},
			recipients: [
				{
					phone: `${process.env.WHATSAPP_RECIPIENT_PHONE_NUMBER}`,
					name: "David",
					variables: { 1: "David", 2: "Mac and Cheese" },
				},
			],
		},
	});
	console.log("Broadcast created:", data.broadcast.id);
}
The createBroadcastList function creates a new broadcast using an existing message template and a list of recipients. When executed, the function logs the broadcast ID to the console. This ID can then be used to send or schedule messages to all recipients in the broadcast list.
Copy the following code snippet to send an instant message to the contacts in the broadcast list.
async function sendInstantMessage() {
	const { data } = await zernio.whatsapp.sendWhatsAppBroadcast({
		path: { broadcastId: "YOUR_BROADCAST_ID" },
	});
	console.log(`Sent: ${data.sent}, Failed: ${data.failed}`);
}

sendInstantMessage();
Finally, you can schedule broadcast messages by providing a scheduledAt attribute with an ISO 8601 formatted timestamp.
async function scheduleBroadcast() {
	await zernio.whatsapp.scheduleWhatsAppBroadcast({
		path: { broadcastId: "YOUR_BROADCAST_ID" },
		body: { scheduledAt: "2026-03-22T19:36:00.000Z" },
	});
	console.log("Broadcast scheduled for 2026-03-22T19:36:00.000Z");
}

scheduleBroadcast();
The scheduleBroadcast function schedules a broadcast using the broadcast ID and the specified time. Once executed, the broadcast will be sent automatically at the scheduled date and time.
If you want to interact with the Zernio API directly or use another programming language, check out the Zernio WhatsApp API documentation. It includes details on pricing, supported file formats and media requirements, and debugging and troubleshooting tips.
When should you use Zernio instead of the Cloud API?
When working with social media APIs, publishing content across multiple platforms gets messy when you're juggling multiple API endpoints — each with its own authentication method, request format, and media upload workflow.
Zernio gives you one API for WhatsApp and 13 other platforms. Below are the key differences:
Platform-specific authentication
Most social media platforms require different authentication mechanisms such as OAuth flows, app passwords, or API keys. Each method has its own setup process, token management system, and permission scopes.
Zernio handles the authentication process for you. Once your account is connected to Zernio, you can publish posts through the unified API without managing platform-specific tokens or authorisation flows.
Different API payload structures
Every social platform expects requests in a slightly different format. Zernio standardises these differences by allowing you to send a single payload format that works across supported platforms.
const response = await fetch("https://zernio.com/api/v1/posts", {
  method: "POST",
  headers: { "Authorization": `Bearer ${process.env.ZERNIO_API_KEY}` },
  body: JSON.stringify({
    text: "New feature drop!",
    platforms: ["twitter", "instagram", "linkedin"],
    mediaUrls: ["https://example.com/demo.mp4"],
    scheduledFor: "2025-01-15T09:00:00Z"
  })
});
Media upload complexity
Uploading images or videos is often one of the most complicated parts of social media integrations. Zernio handles the upload flow for you, allowing you to attach media to posts without handling the platform-specific upload process.
Rate limits and platform restrictions
Social media platforms typically enforce rate limits that restrict how frequently your application can interact with their APIs. Zernio helps manage these platform-specific constraints automatically.
Cloud API vs Zernio: which to choose
| Meta Cloud API (direct) | Zernio | |
|---|---|---|
| Setup time | 2–4 weeks (Business verification, webhooks, hosting, templates) | Under 30 minutes |
| Cost to send | Meta's per-template fee only ($0.0014–$0.0768 by country) | Flat monthly plan, WhatsApp included free |
| Meta Business Verification | You handle it | Zernio handles it |
| Other platforms supported | WhatsApp only | 15 platforms (Instagram, TikTok, LinkedIn, X, and 10 more) |
| Template management | Meta Business Manager dashboard | API + Zernio dashboard with one-click approval flow |
| Rate limit handling | You build retry logic | Automatic with exponential backoff |
| Bulk send / broadcasts | Build it yourself | Native broadcast API |
| Webhooks | Configure and host your own endpoint | Managed; Zernio normalizes events across platforms |
| AI agent integration | REST only | REST + MCP server + CLI |
| Best for | Engineering teams who want raw Meta rates and full control | Teams shipping fast, agencies, AI products needing WhatsApp + more |
Use the Cloud API direct if WhatsApp is your only channel and you have engineers to maintain the infrastructure. Use Zernio if you need WhatsApp plus the other platforms developers and AI agents reach for, with one auth and one bill.
FAQ
Is the WhatsApp API free to use?
The Meta Cloud API itself is free. You only pay Meta's per-template message fee, which ranges from $0.0014 (India) to $0.0768 (Germany) depending on country and message category. Free-form messages and utility templates inside the 24-hour customer service window are free. See our Twilio WhatsApp pricing breakdown for a full cost comparison.
Do I need a WhatsApp Business Account to use the API?
Yes. You need a Meta WhatsApp Business Account (WABA) and a Meta Business Manager profile. The personal WhatsApp app and WhatsApp Business app are not the same as the WhatsApp Business API.
Can I send WhatsApp messages without writing code?
Yes, through managed platforms like Zernio you can send broadcasts and templates from a dashboard. The Cloud API itself requires code (or a no-code automation tool like n8n).
What's the difference between Meta Cloud API and Twilio WhatsApp API?
Meta Cloud API is WhatsApp's official API maintained by Meta — cheaper, but you handle hosting and templates. Twilio resells the same underlying API with a $0.005 per-message platform fee plus extra features like number provisioning. See our Twilio vs Zernio comparison.
Can I send media (images, videos) via the WhatsApp API?
Yes. You can attach media by hosted URL (set the link field) or by uploading the file first and using the returned media ID. The Cloud API supports images, video, audio, and documents.
How do I send WhatsApp messages in Python?
Use the requests library to POST to https://graph.facebook.com/v22.0/{phone-number-id}/messages with your access token in the Authorization header. See the Python code example above.
Conclusion
In this tutorial, you've learnt how to send WhatsApp messages and templates using both the Meta Cloud API and Zernio. You also explored how to send text, media, and template messages, as well as creating and scheduling broadcasts to reach multiple contacts efficiently using Zernio.
It's also important to note that Zernio includes WhatsApp messaging in your plan at no extra cost, while Meta charges per delivered template message directly to your WhatsApp Business Account.
Here are some helpful resources to explore next:
- Social Media API for AI Agents: The Complete Integration Guide
- Instagram DM API for SaaS Apps - The Complete Guide
- How to Post to Social Media Using OpenClaw - Step-by-Step Guide
Sign up and get your free API key to enable automated posting, monitoring, and engagement across multiple platforms.